Got headache of remote controlling and managing your legacy PLC? Taking your laptop to field and update them time and time again should not be a good solution, it’s time to use the Bivocom TR321 IoT router to overcome these challenges.
The following article tells you how to upgrade your legacy PLC with Bivocom TR321 industrial IoT router. Benefit from Bivocom cellular network communication technology, Bivocom TR321 helps to connect your legacy PLC and controller to cloud, which is smart and easy for remote management.
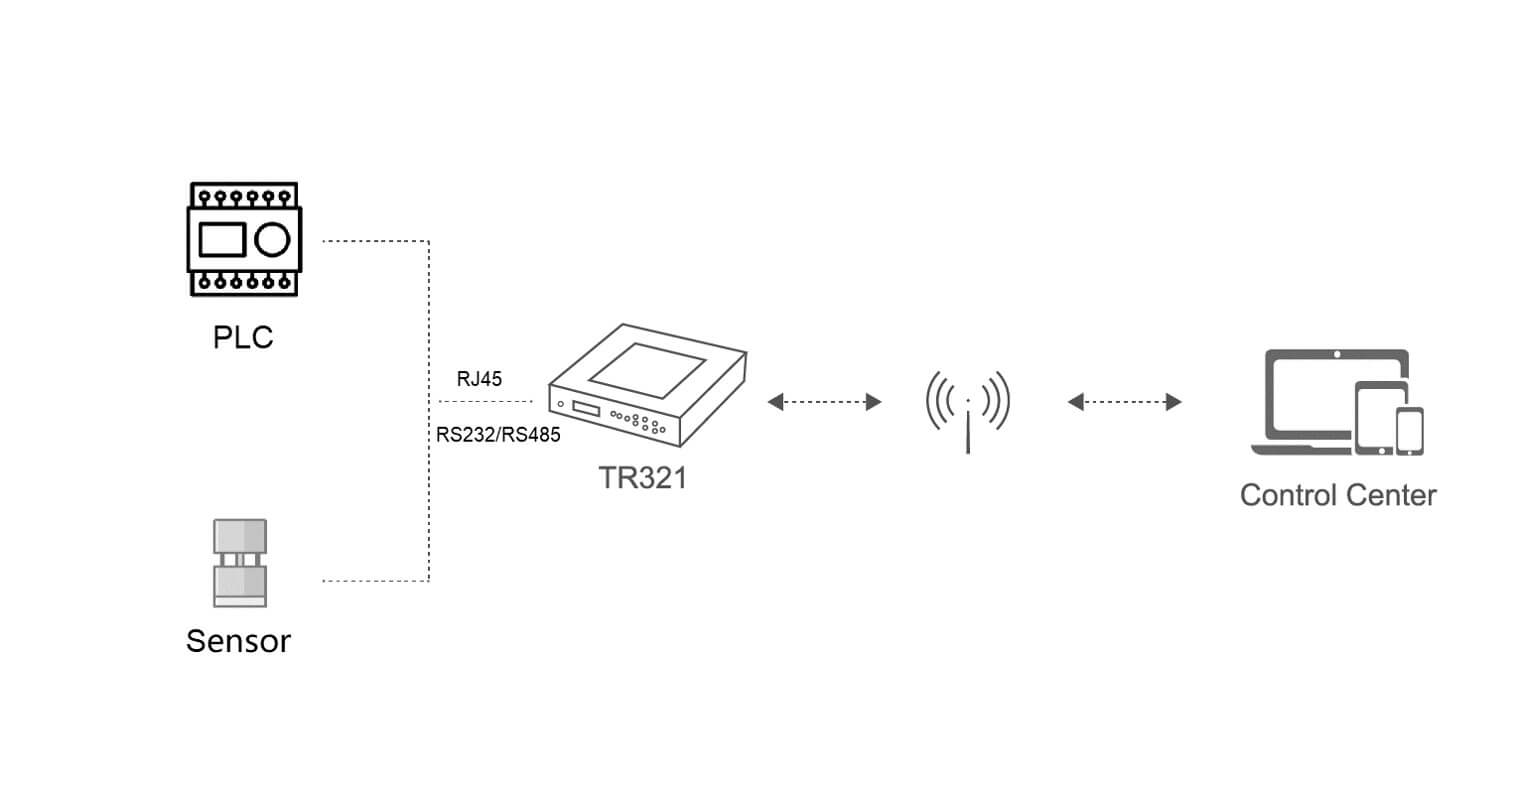
Bivocom TR321 industrial router supports multiple protocols to communicate between your PLC/controller and your SCADA platform. It supports Modbus TCP/RTU, MQTT, TCP/IP, UDP, HTTP, etc.
We all know Modbus protocol is widely used for IoT and M2M, Bivocom TR321 can work as a Modbus Master to acquire data from PLC or sensors via RS232, RS485, and RJ45 ports. Normally, PLC provides Ethernet RJ45 for communication, in this case we can setup TR321 as Modbus TCP Client to acquire data from PLC following the preset rules, and transmit data to cloud server via TCP/UDP/MQTT/HTTP, etc.
This article will tell you how to setup Bivocom TR321 Modbus TCP feature to acquire PLC data and transmit to your cloud data center.
Steps
- Setup Bivocom TR321 and connect your laptop network in TR321’s LAN by Ethernet cable or WiFi.
- Ensure the firmware is higher than 21.1.1.37. If not, please ask Bivocom support for latest firmware.
- Telnet to TR321 from your laptop by “telnet 192.168.1.1” the username password both “admin” as default.
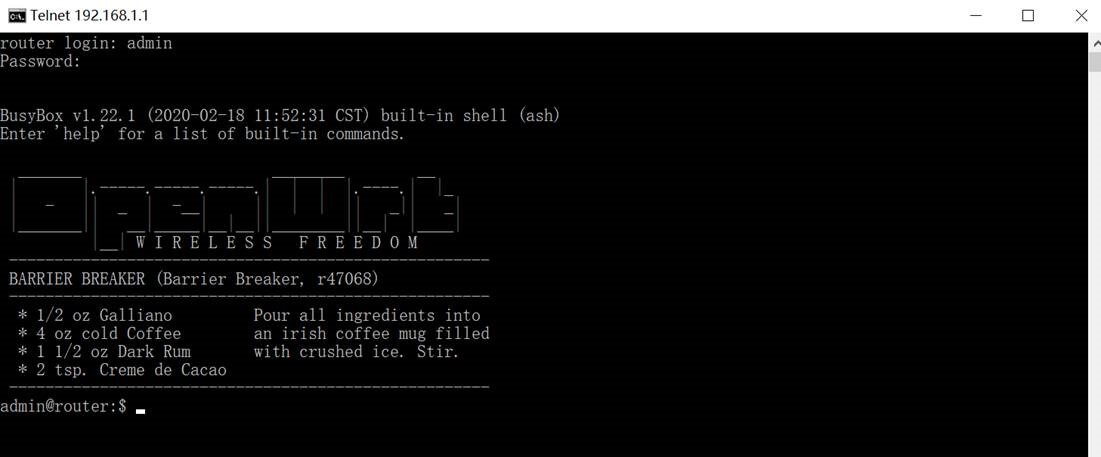
- Execute a command “hw_info set model 2:S:E:S:1” to enable Modbus TCP feature.

- Full reset to factory by long press the “Reset” hole.
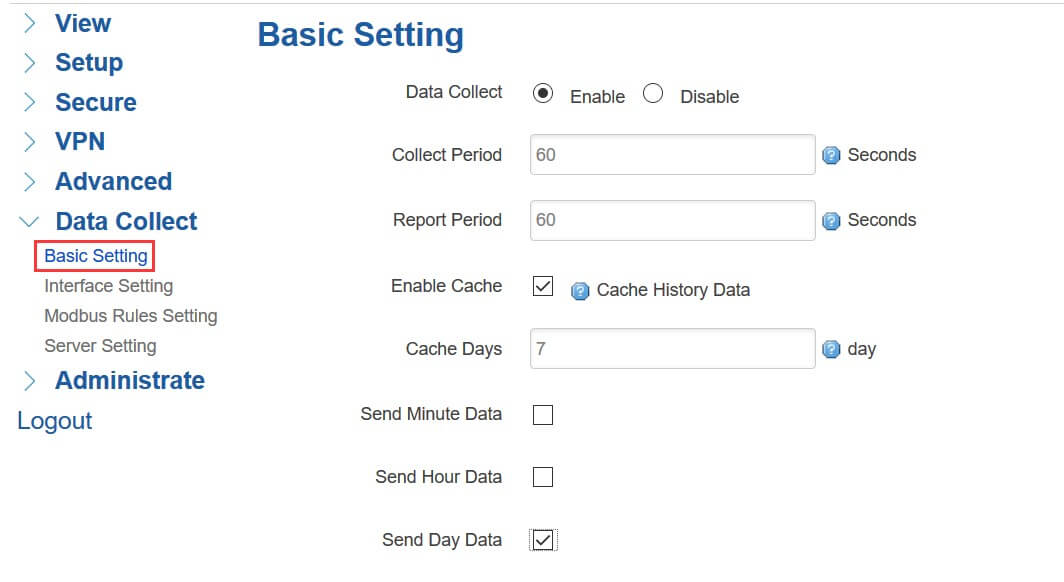
- Enable the Data Acquire feature by setting on “Basic Setting”, set the collect period, report period, and other related settings.
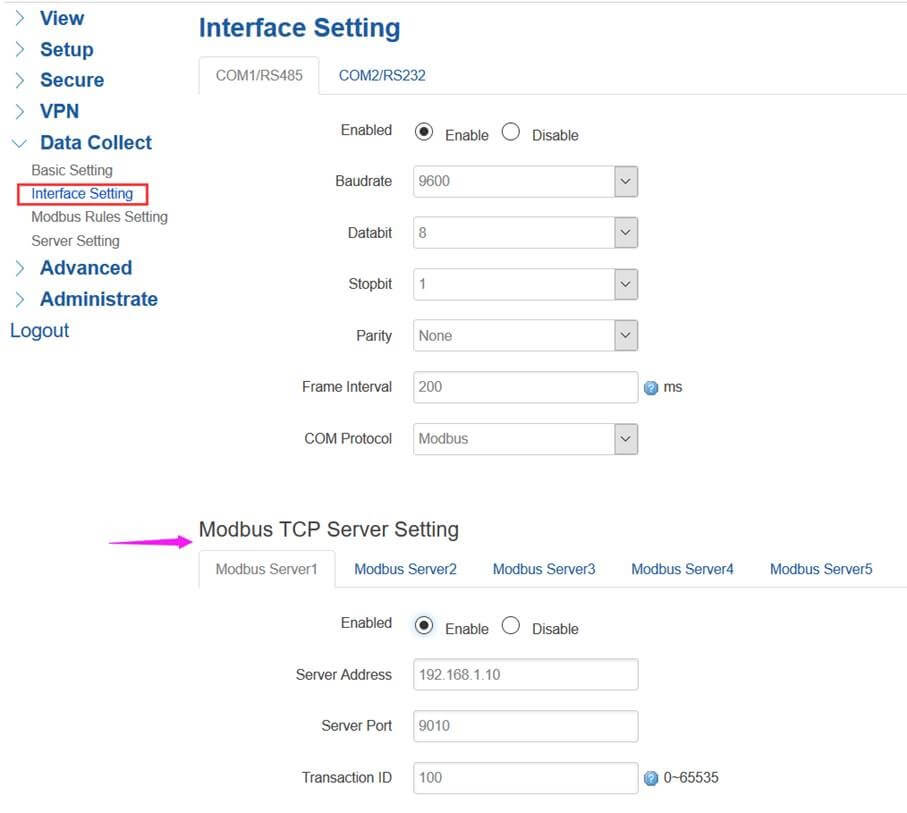
- Reconnect to your TR321 and access to its WebUI, there is an “Interface Setting” menu for Modbus TCP setting.
- Enable a Modbus TCP server and config the IP address according to your PLC IP address.
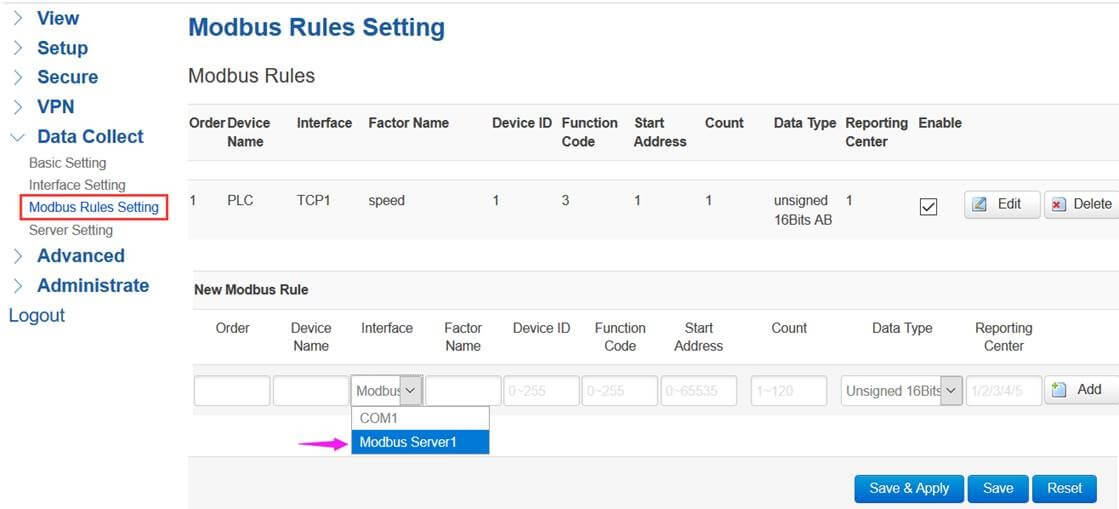
9. Setting the Modbus Rules according your PLC device datasheet. On the “Modbus Rules setting” menu, choose the Interface as “Modbus Server 1” which we enabled in previous step, and configure other Modbus rule settings then “Add” and “Save & Apply”.
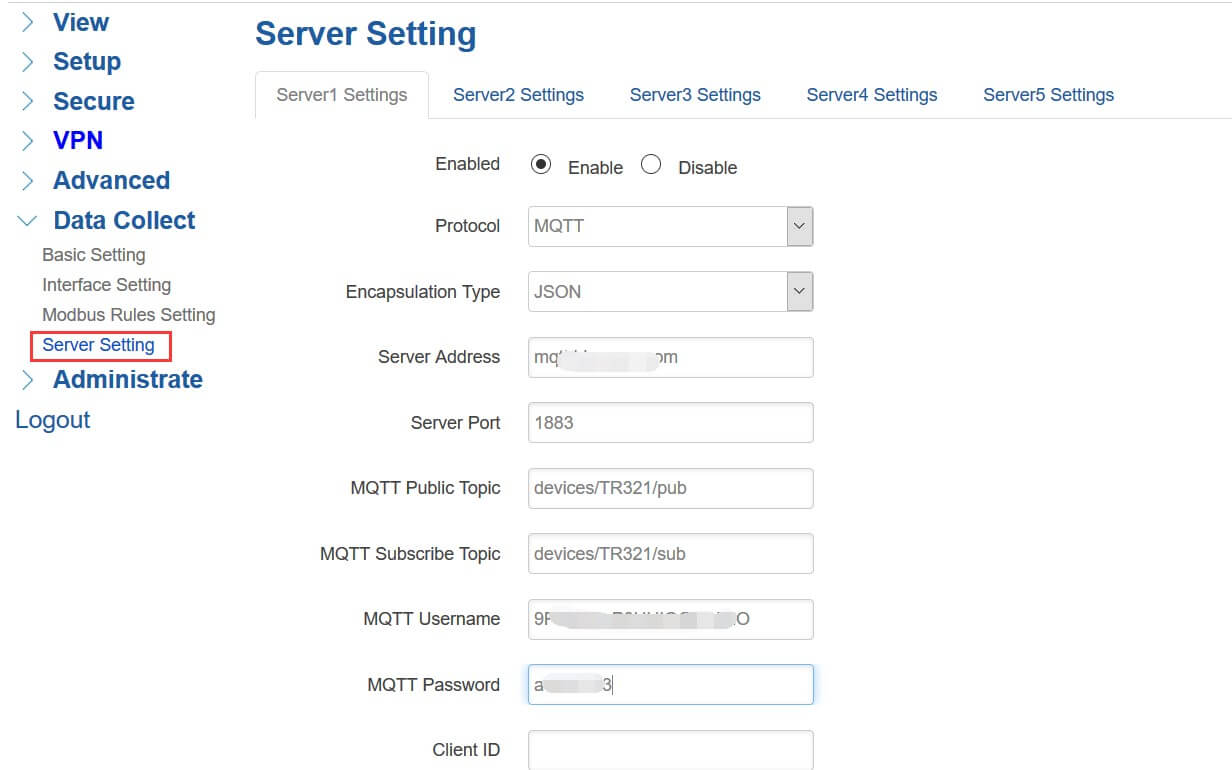
- Setting your data center server. Transmit the data to your data center by configuring the Server Settings, Bivocom TR321 supports multiple protocols like MQTT, TCP, UDP…, and reform the data format as Json, Transprant, or HJ212 (special for some Environment SCADA in China).
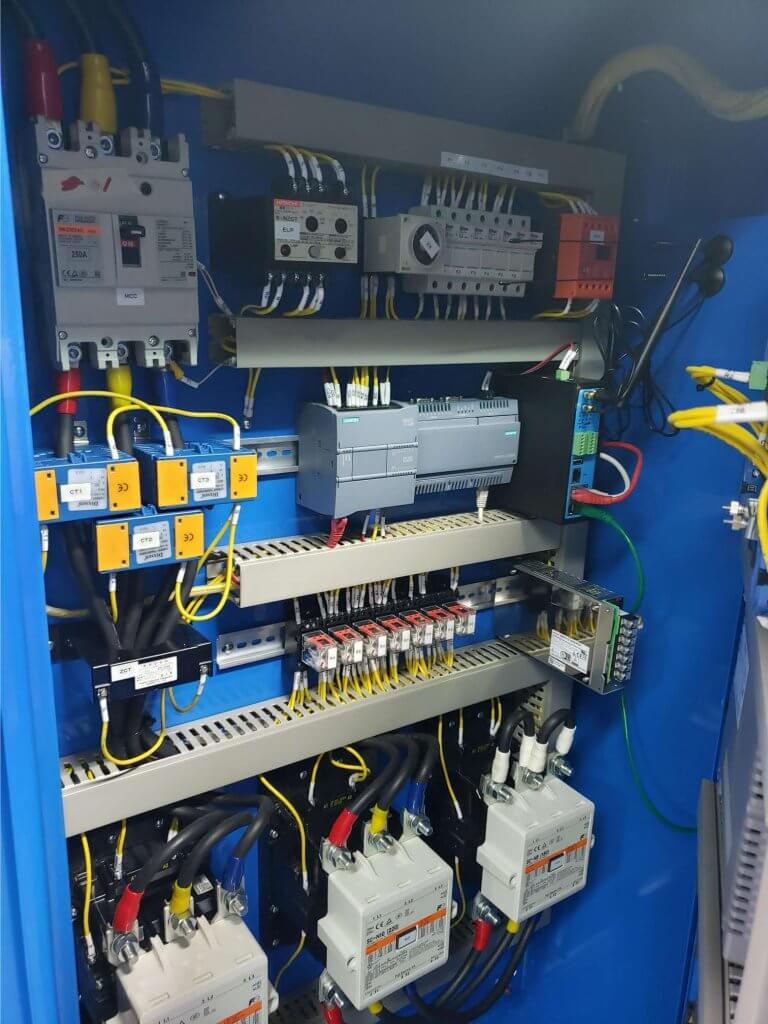
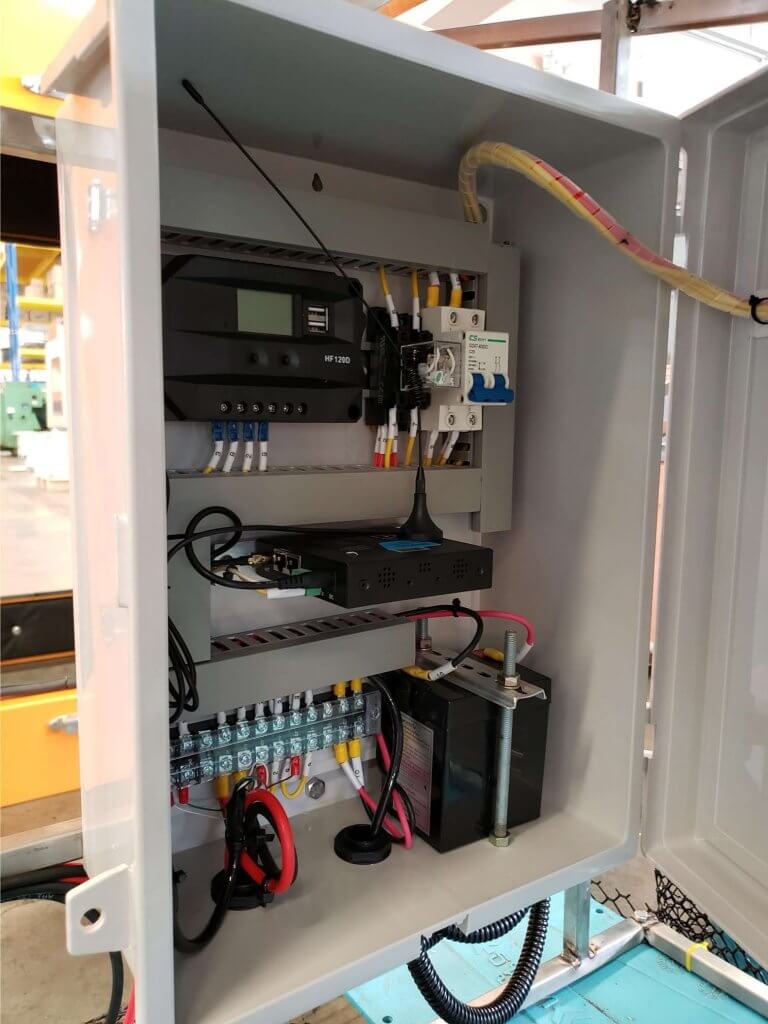
After all previous settings done, Bivocom TR321 will connect your PLC and your SCADA platform for data communication without any manual operation. Contact Bivocom representative to get a demo now, it’s time to upgrade your legacy PLC by using Bivocom IoT routers.



Comment