In this article, we’re going to show you how to quickly set up MQTT on industrial cellular router Bivocom TG451. But before we start this, we need to know what’s MQTT, what is used for?
What is MQTT?
MQTT, stands for Message Queuing Telemetry Transport, is an OASIS standard messaging protocol for the Internet of Things (IoT). It is designed as an extremely lightweight publish/subscribe messaging transport that is ideal for connecting remote devices with a small code footprint and minimal network bandwidth. MQTT today is used in a wide variety of industries, such as water, mining, power, oil and gas, etc.
For example, in weather service application, all the sensors as publisher publish weather data to MQTT Broker, and Weather Service Center or DB subscribe certain Topic to acquire the data from Broker.
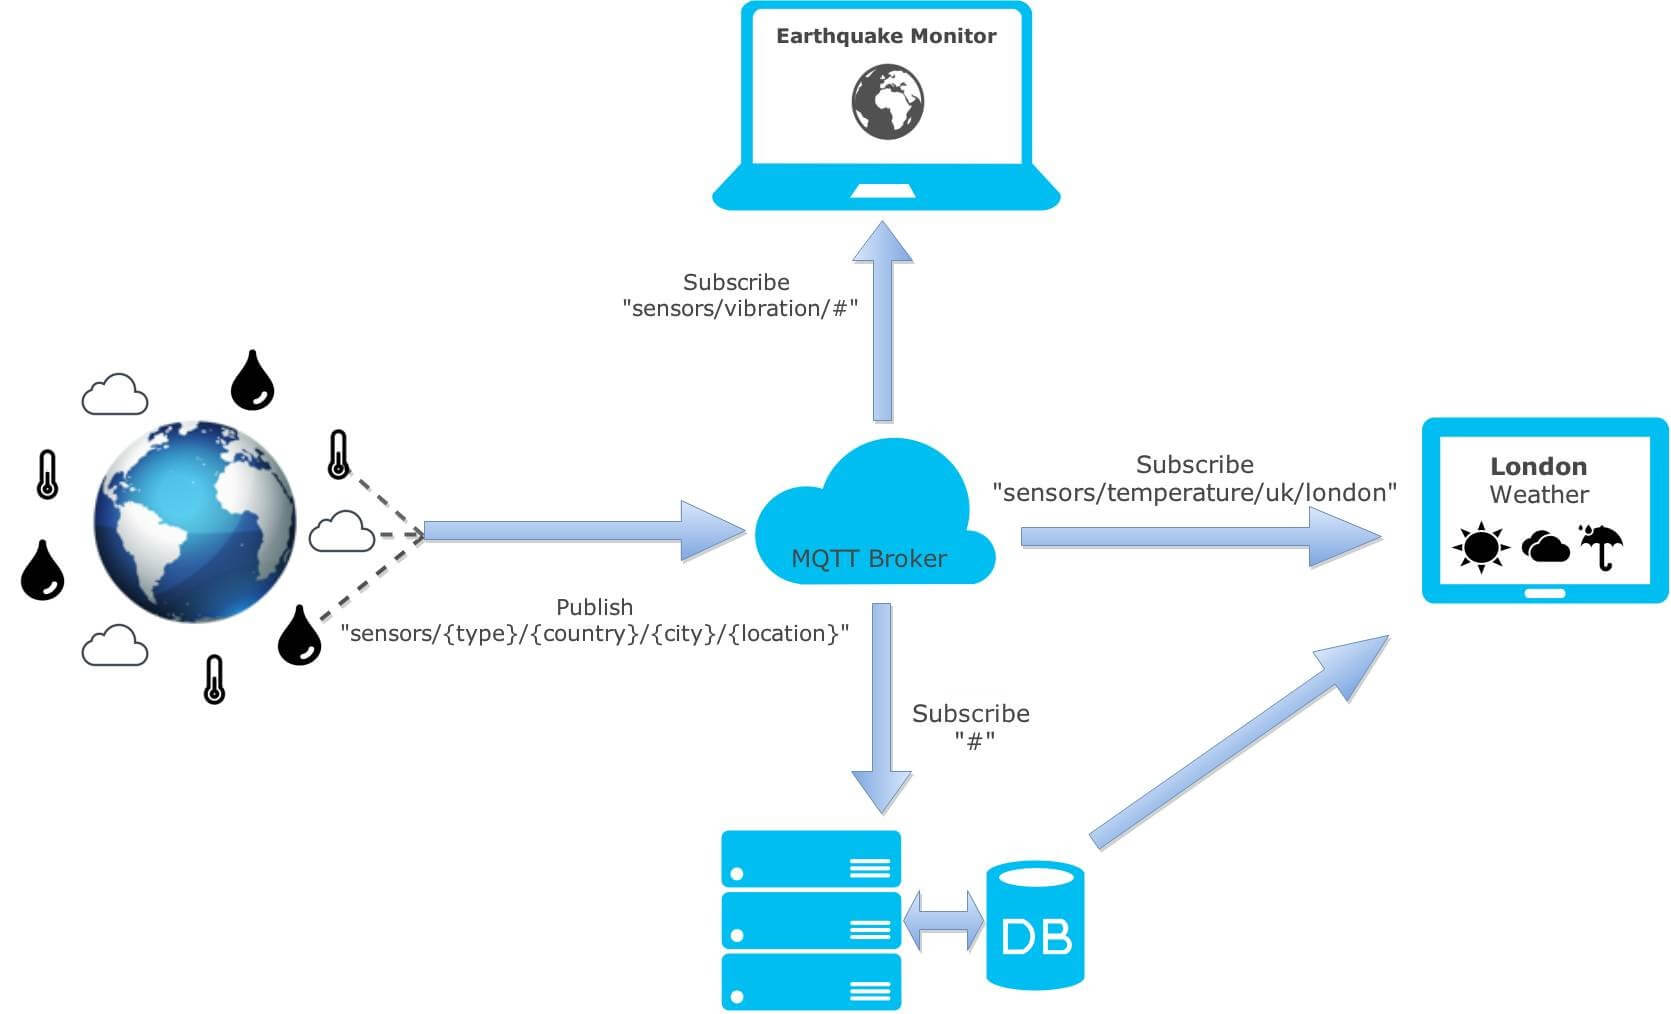
Benefits of MQTT to IoT
- Transfer data and information efficiently
- Save network bandwidth consumption
- Scalable to massive IoT sensors
- Support low-bandwidth, high latency, unreliable networks
How to Set Up MQTT on Industrial Cellular Router?
1. Configuration on MQTT Broker/Platform
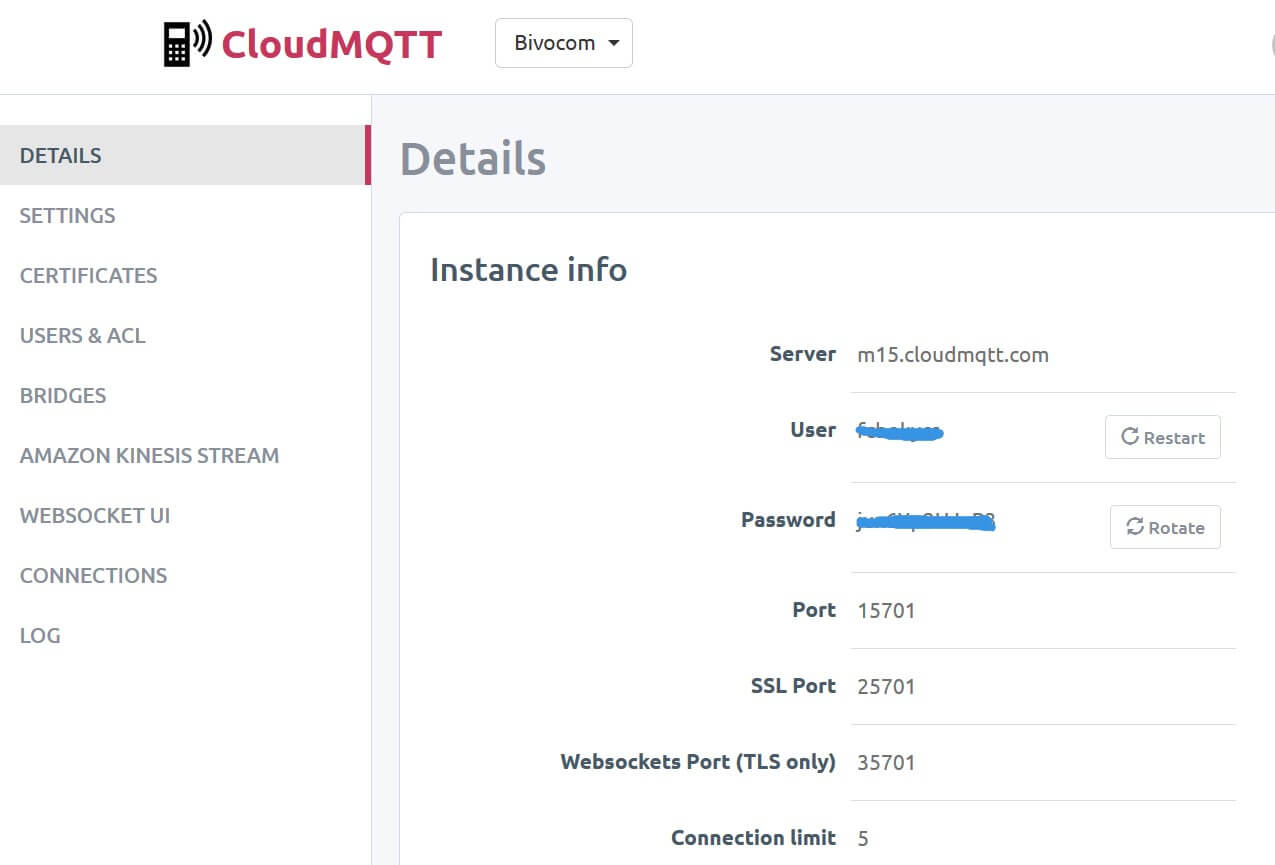
- To run up the MQTT feature, we need a MQTT Broker, here we take a broker account as example from CloudMQTT.com platform
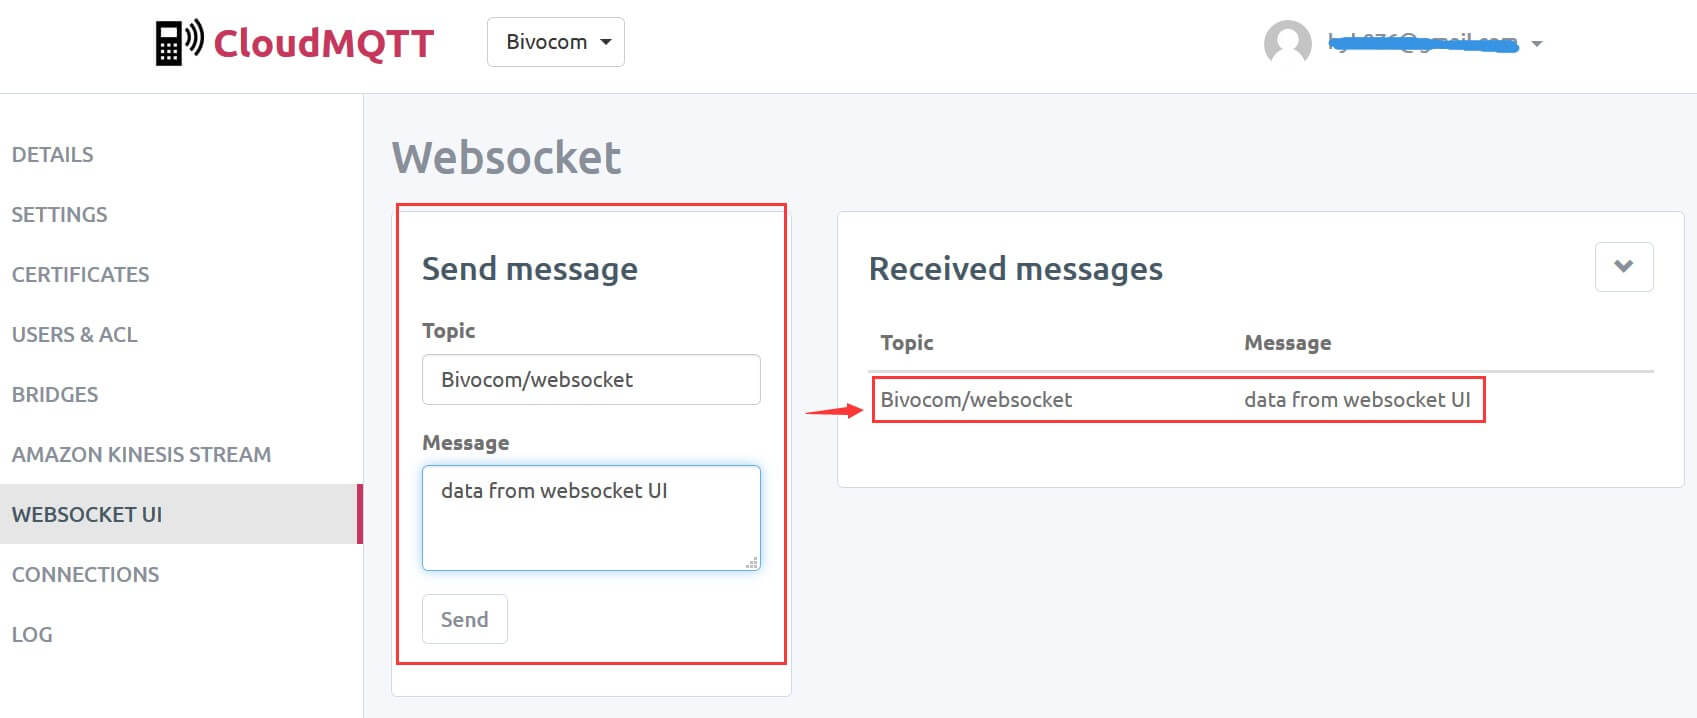
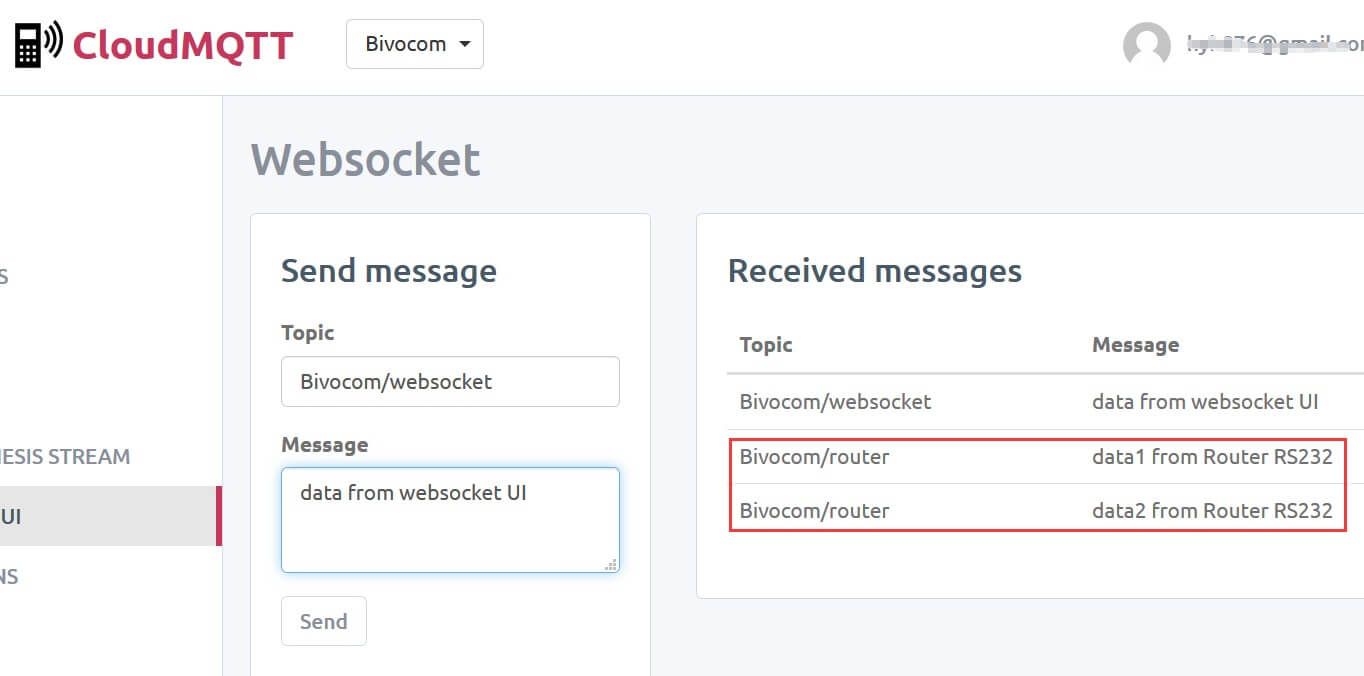
- CloudMQTT.com also provide a simple websocket UI as a publisher for quick test. The Received messages will display respective Topic with Message from publishers.
2. Configuration on Bivocom Router
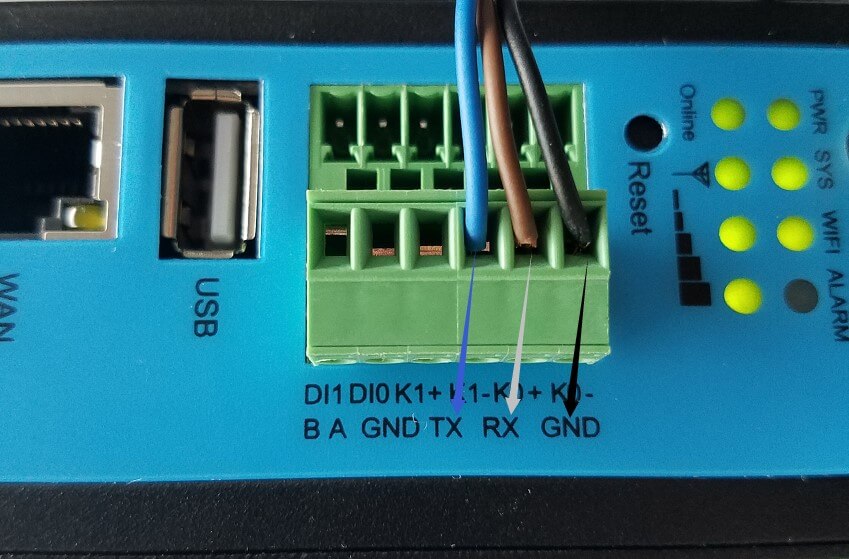
- Bivocom Routers and gateways support serial communication (RS232 or RS485) via MQTT. Before go into setting, please connect your slave computer like PLC or sensors to RS232 /RS485 ports on Bivocom router. In this case, we take Bivocom TG451 as a demo.
- Bivocom standard package contents Console Cable(3-Pin RS232), connect one side to RS232 ports on Bivocom router (the Black pin to GND port, while Brown pin to RX port, Blue pin to TX port). The other side connect to your slave computer, you may need extra adapter cable if your PLC/sensors don’t have standard serial communication interface.
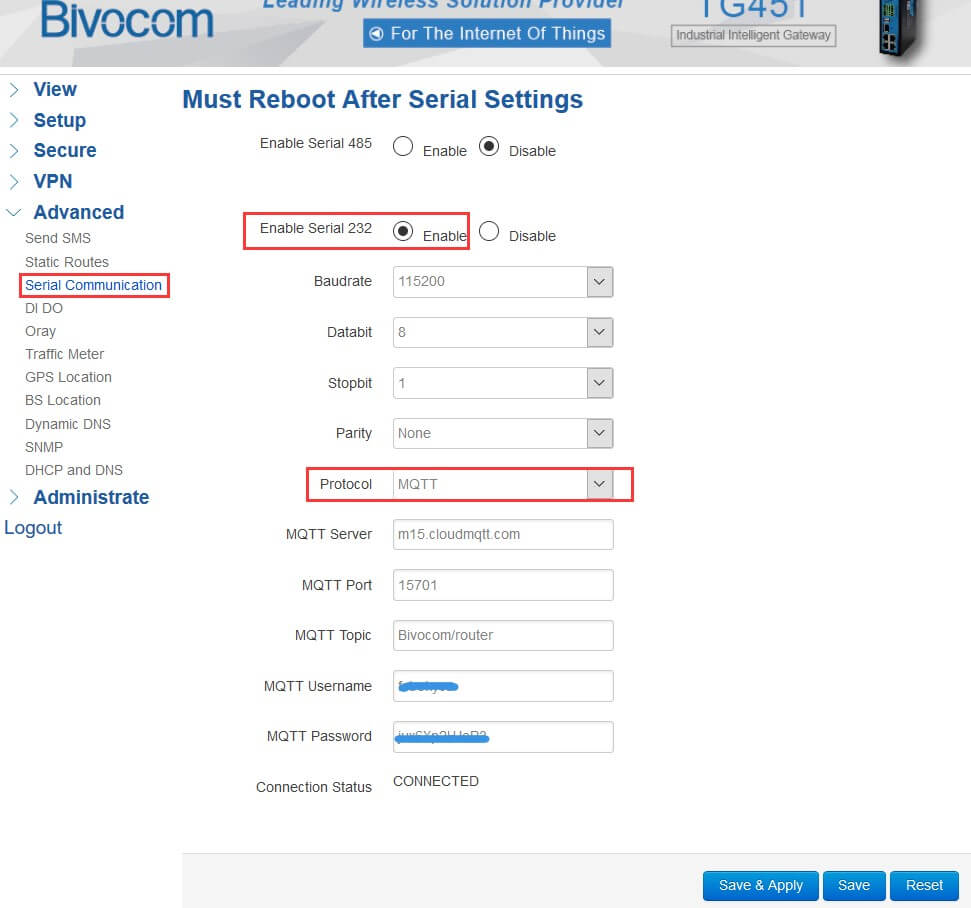
- Go into the WebUI of Bivocom router, >> Advanced>>Serial Communication, Enable Serial 485 or 232 >> Select MQTT as protocol.
- Input the necessary MQTT server info we got from step 2, Save & Apply, if everything was correct, the Connection Status will indicate “CONNECTED”
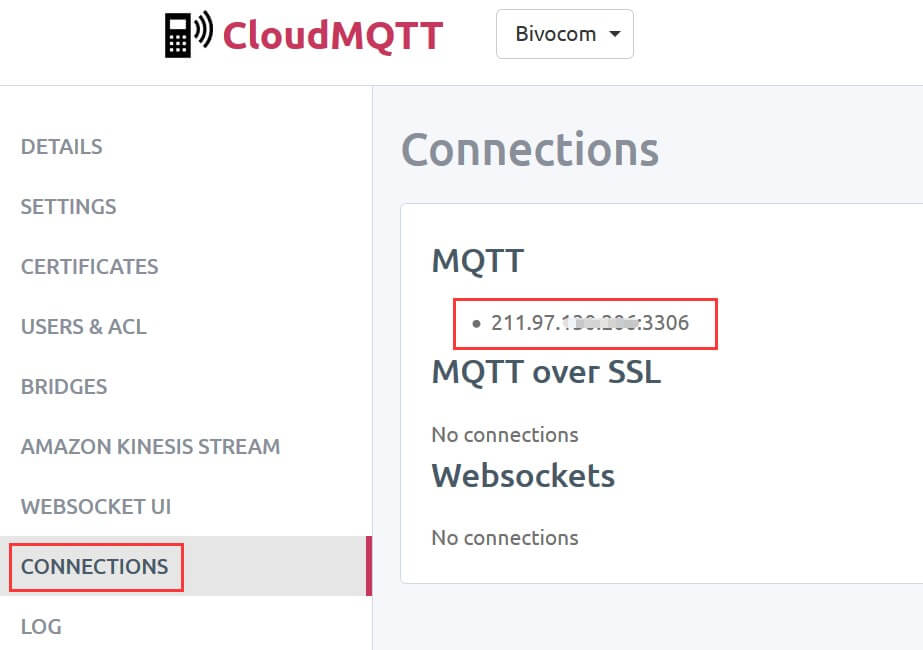
- On the CloudMQTT.com platform, you can also check the CONNECTIONS list the Bivocom router IP address on. After that, you are able to perform MQTT publisher on Bivocom router.
3. MQTT Feature Demo
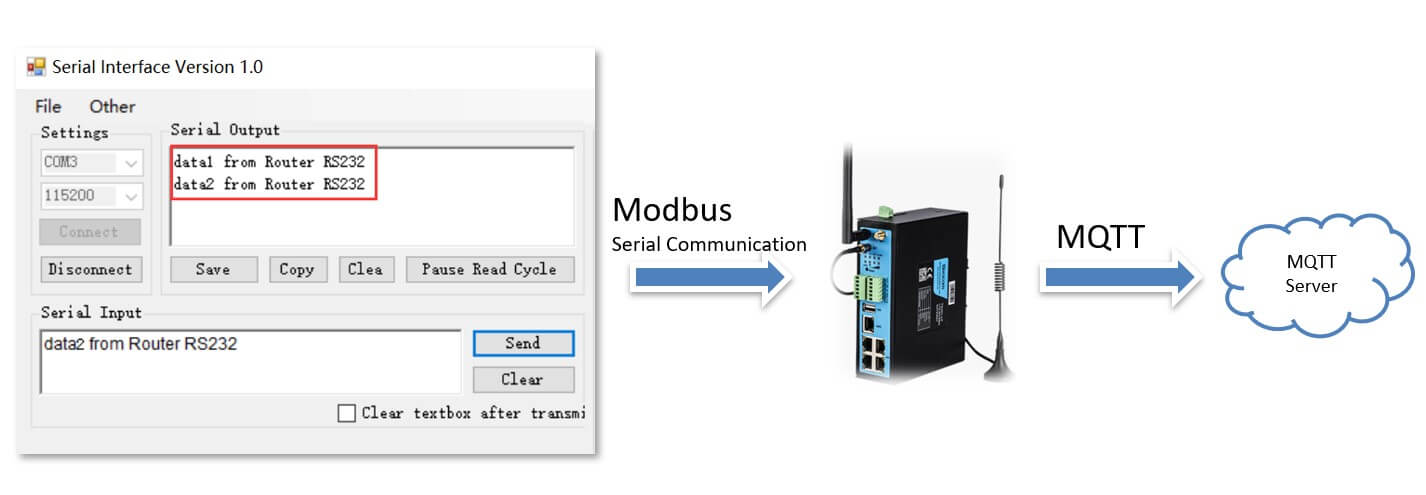
- To simulate the slave computer, we use a simple serial communication tool running on PC which connected to Bivocom router via RS232. Then send data as publisher to MQTT Broker.
- MQTT server will receive the message with Topic we have set on Bivocom router
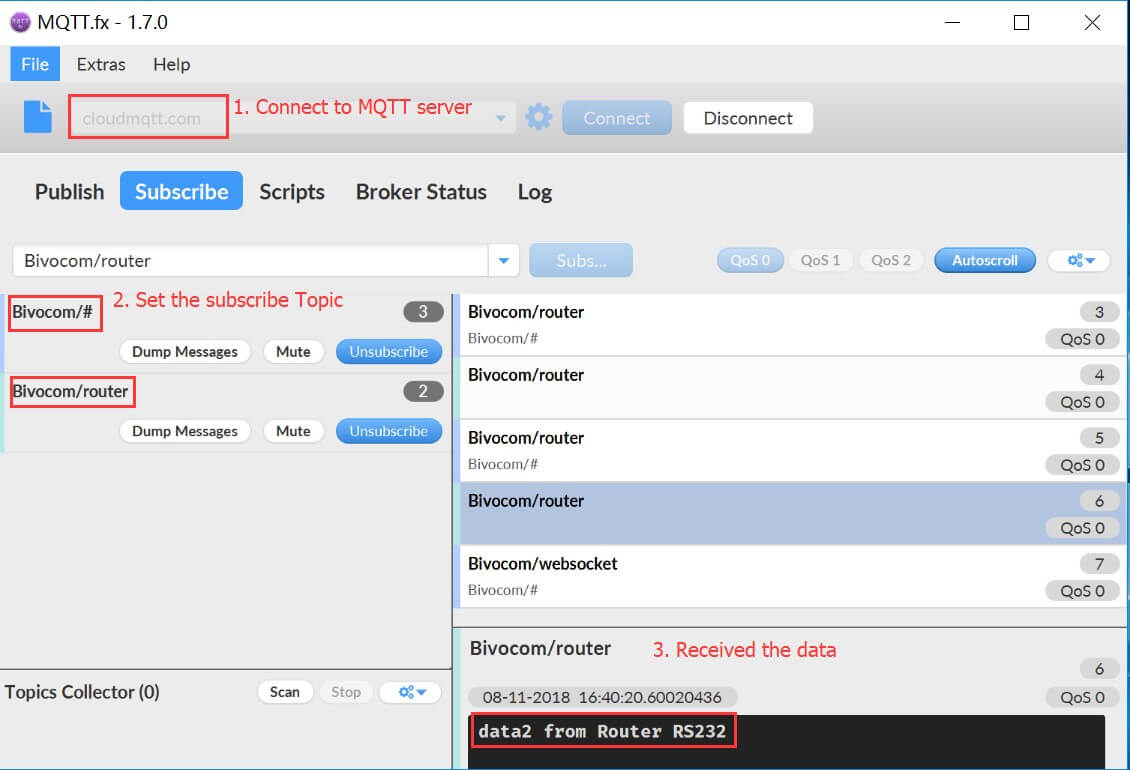
- To subscribe the data, we use a simple tool as subscriber.
- Connect the tool to MQTT server
- Set the exact subscribe Topic, it also supports the variable parameter like “#” “+”
- On the data window, shows the received data from publisher accordingly.


2 Comments