How to Establish NeuronEX(EMQ) on Bivocom Gateway TG465
NeuronEX is a software designed by EMQ for device data collection and edge intelligent analysis in the industrial sector. It is primarily deployed in industrial settings to achieve industrial equipment communication, industrial bus protocol collection, integration of industrial system data, edge data filtering analysis, and AI algorithm integration. Additionally, it facilitates integration with industrial IoT platforms. NeuronEX delivers low-latency data access management and intelligent analytical services tailored for industrial scenarios. Bivocom gateway TG465 already has the ability to integrate NeuronEX, this document will tell you how to setup and create communication between NeuronEX and Slave devices.
1. Download&Run NeuronEX
- Download NeuronEX
Enter the website of EMQ, select the right linux system architecture, we use ARM64 at this case.
Using wget to download.
https://www.emqx.com/zh/downloads-and-install/neuronex?os=Linux

- Installation
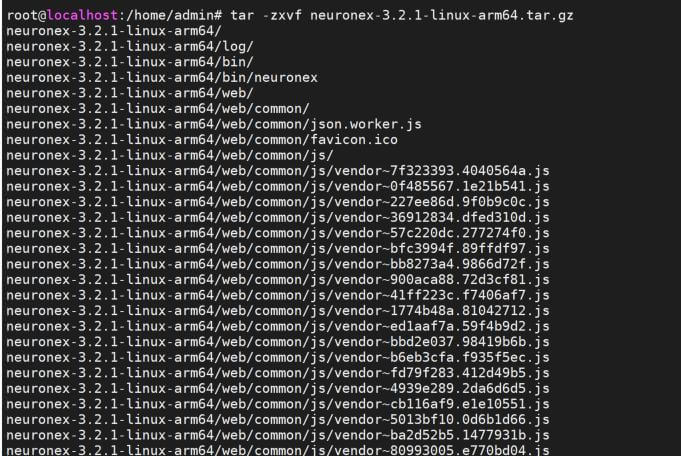
After downloaded successfully, use tar command to extract the package as bellow:
tar -zxvf neuronex-3.2.1-linux-arm64.tar.gz
- Run NeuronEX at background
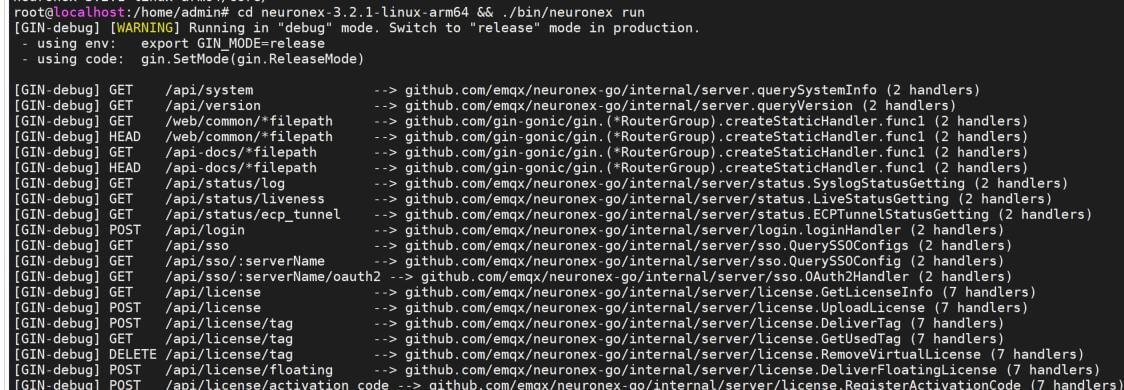
Start NeuronEX program at background, the commad is:
cd neuronex-3.2.1-linux-arm64 && ./bin/neuronex run
- Check running status of NeuronEX
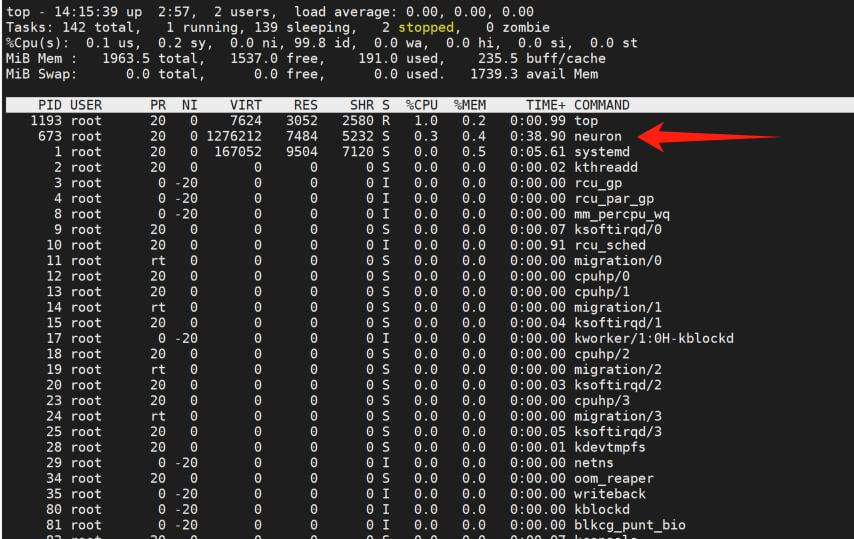
Type top at CLI, check if there is “neuron” process running.
2. Setup NeuronEX
- Login to NeuronEX
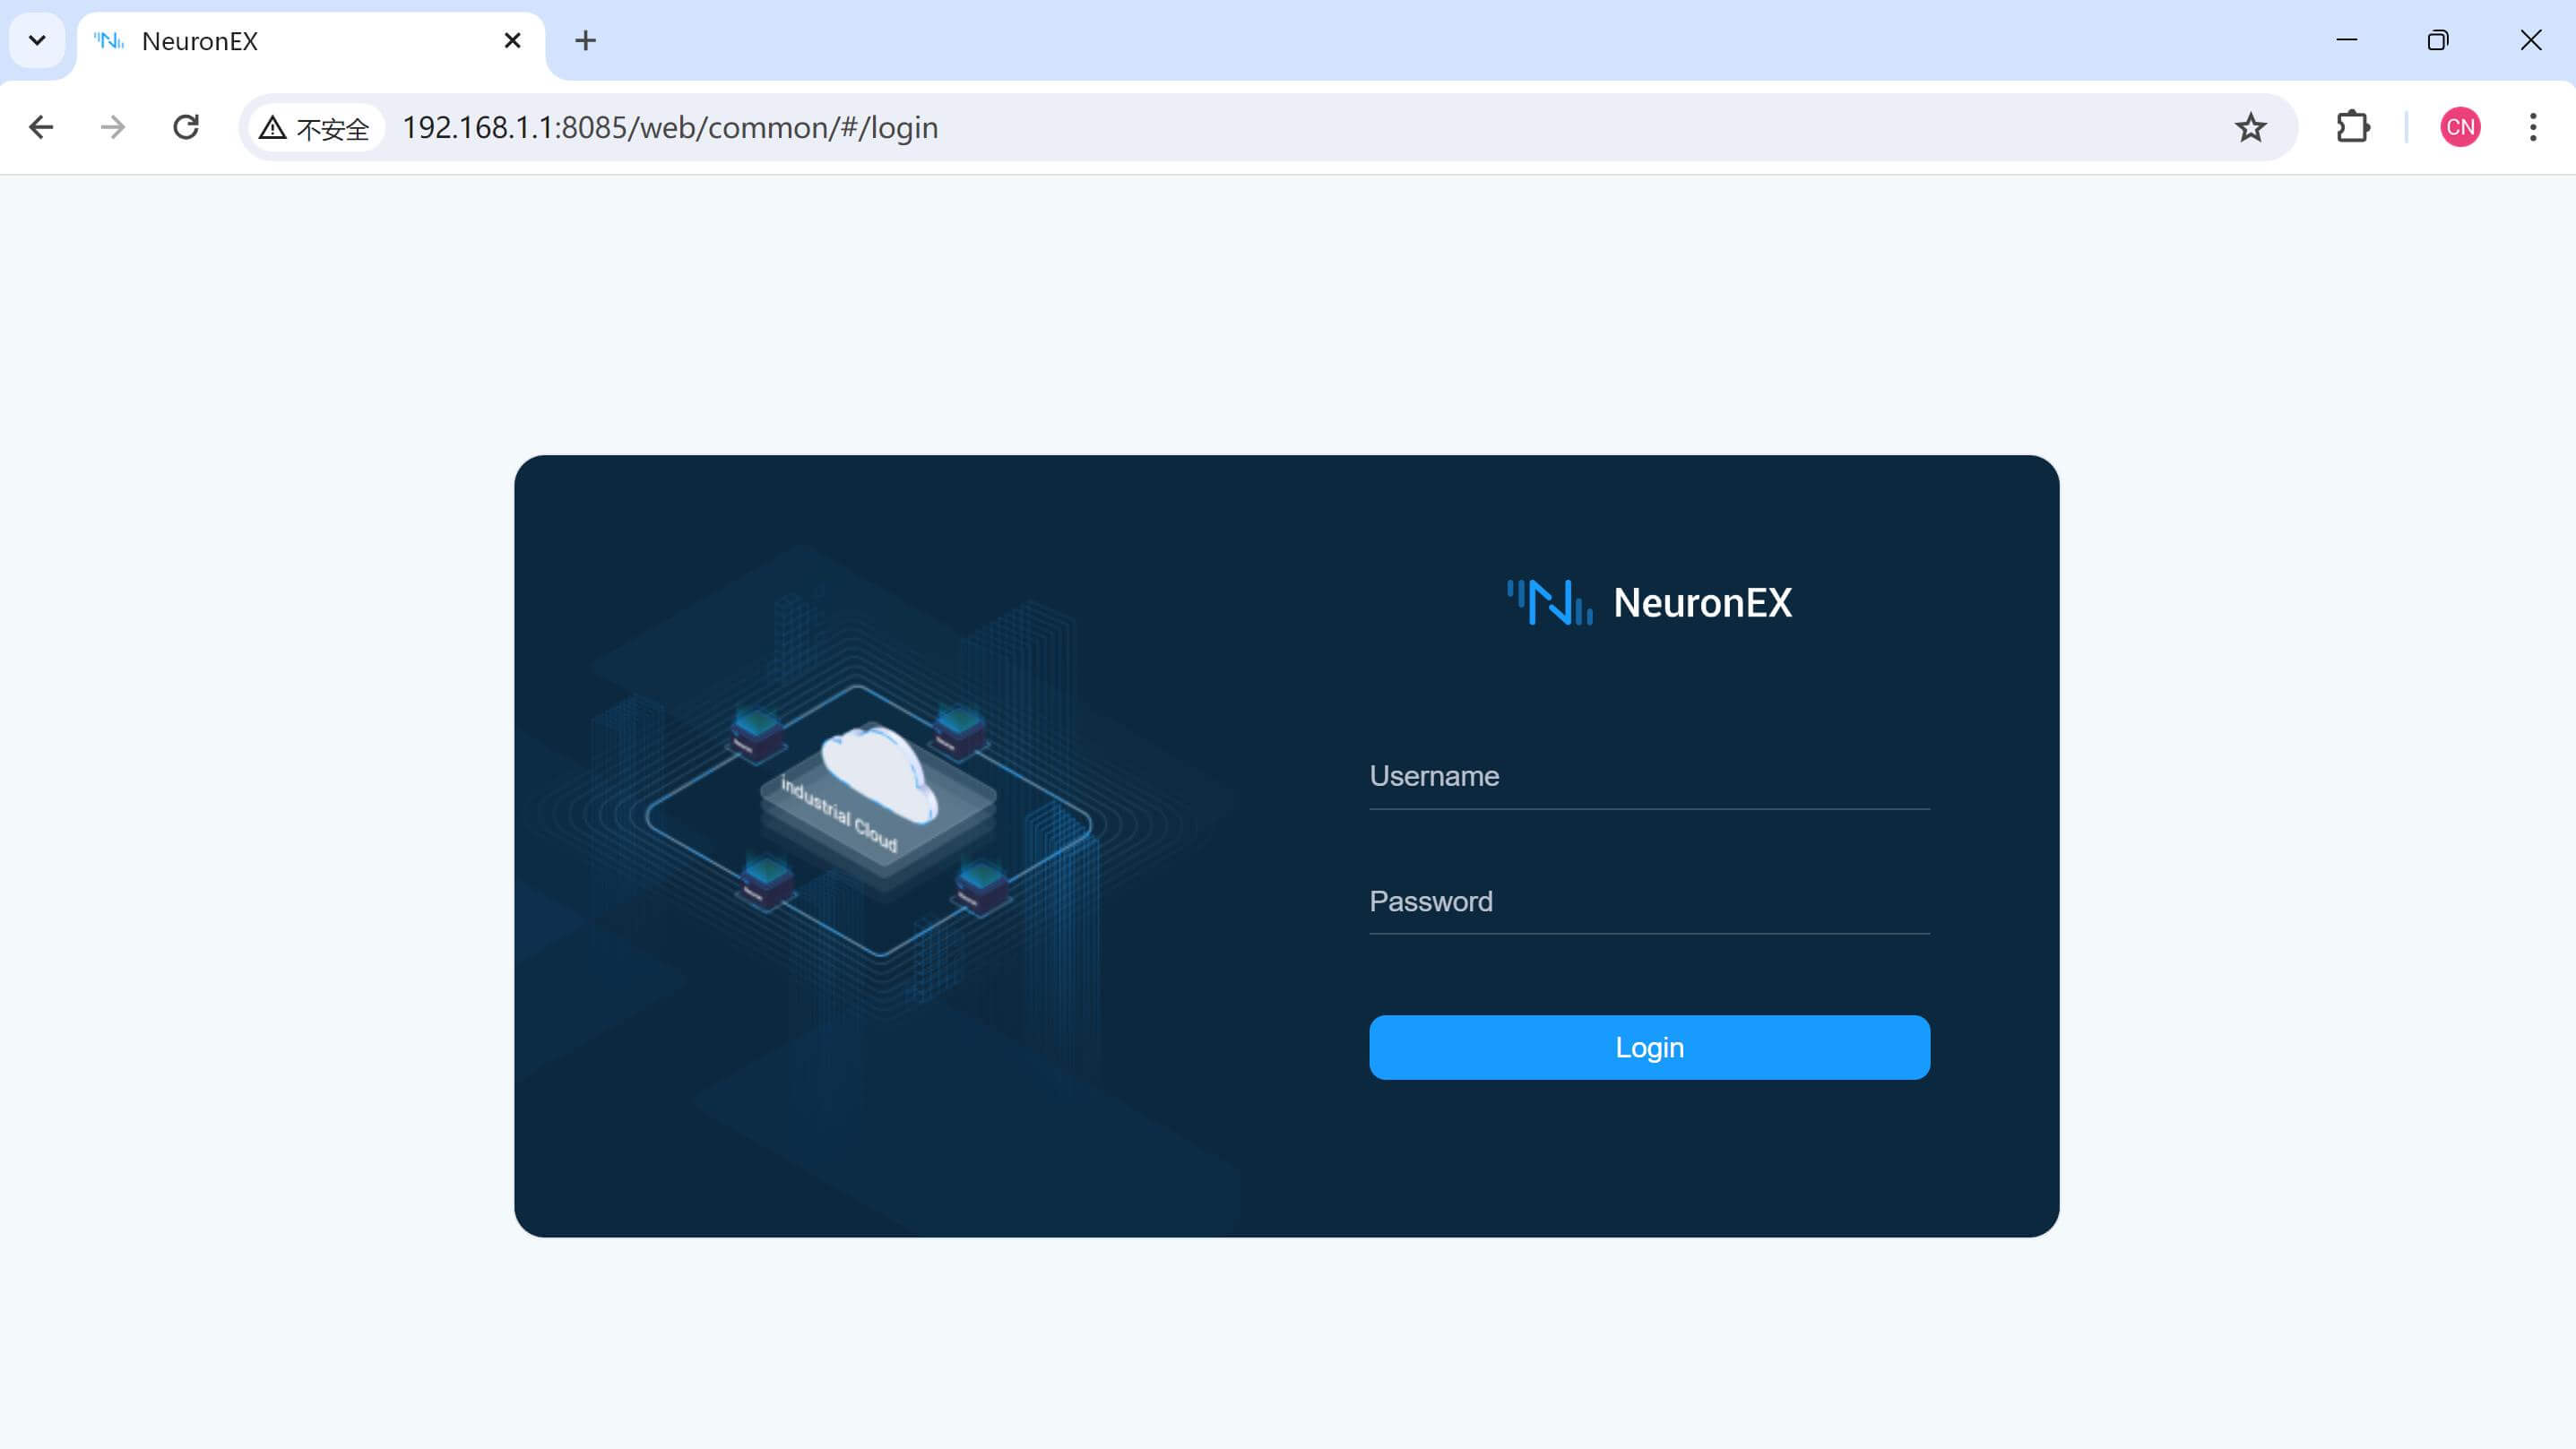
Open your browser and enter NeuronEX WEBUI by using gateway’s IP and port 8085 by default. Such as, http://192.168.1.1:8085/
Use the initial username and password to log in to the management console page (initial username: admin, initial password: 0000). The login page is as shown in the figure below.
- South Device Configuration
- Create southbound device
The south device is used to setup a connection between NeuronEX and the slave devices like sensors, and it will be used to get data from slave devices.
Click “South Devices” in “Data Collection” menu to enter management page, and then click “Add Device” to create a new device.

Here you need to enter Device Name, and select the Plugin protocol as you wish.
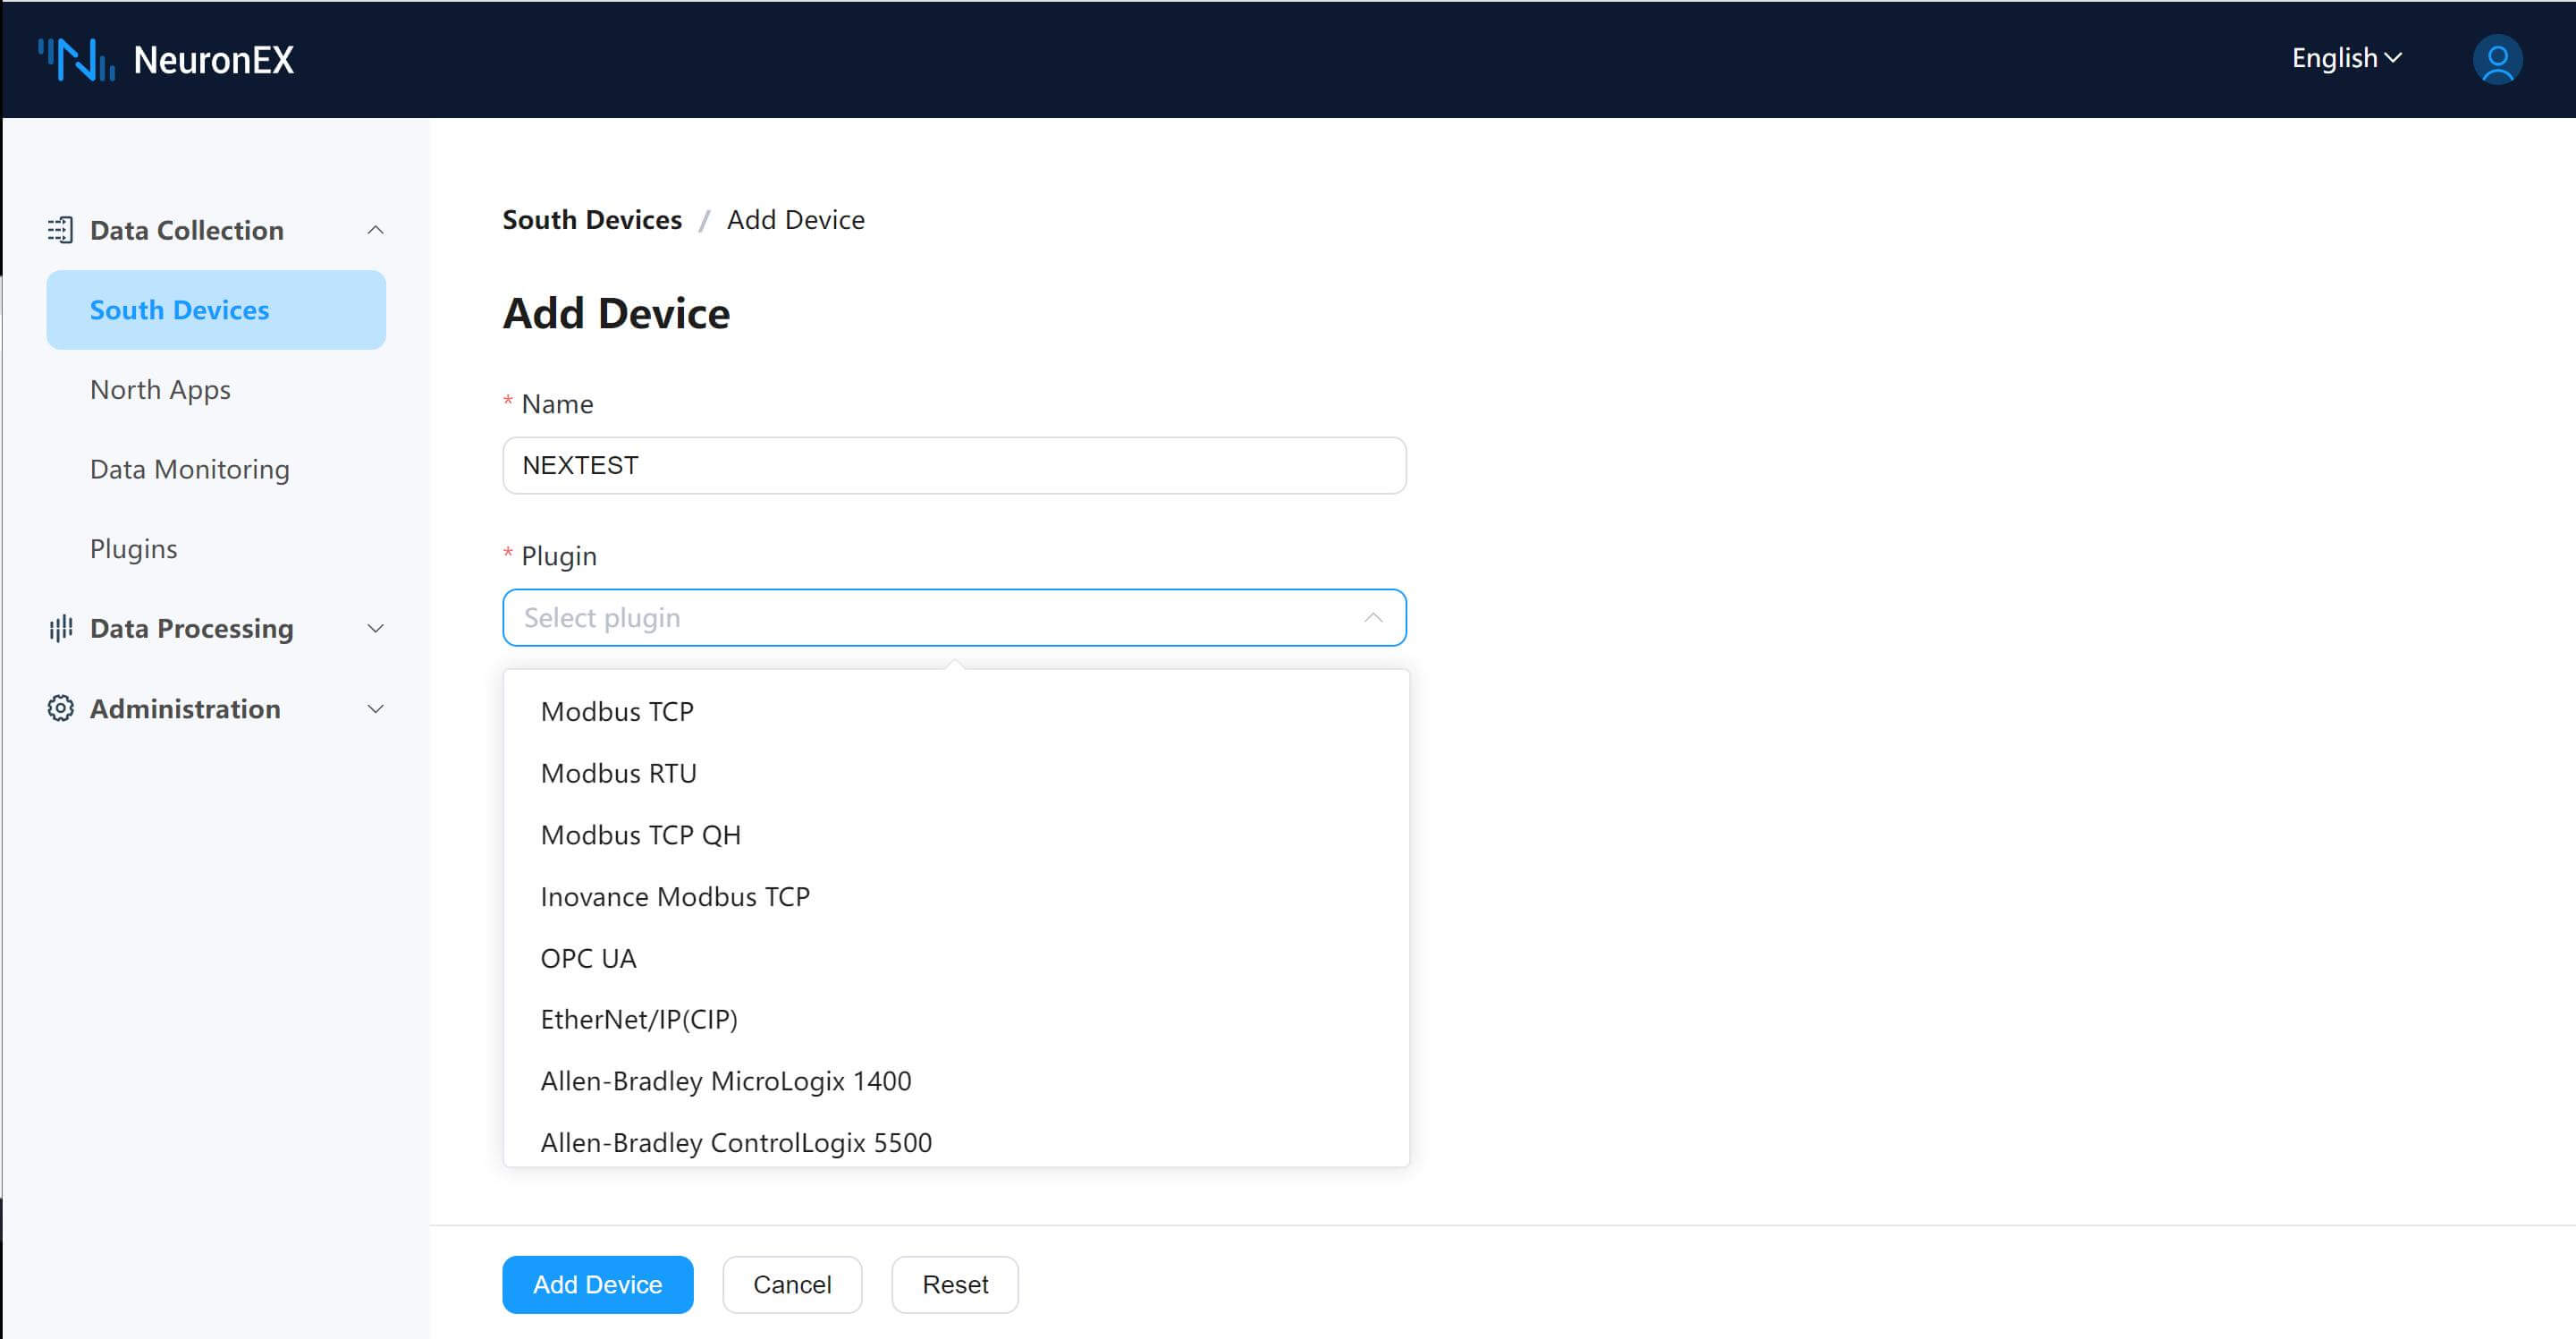
At this case, I setup Modbus TCP plugin to connect with Modbus Slave simulator, and then we need to configure the parameters to establish the connection with slave device.
- Connection Mode: You can chose gateway works as client or server.
- IP address: The IP address of slave device, we will setup IP address of PC because we are connected with Modbus simulator for test.
- Port: default port 502;
Click “Add Device” button after all parameters are established.
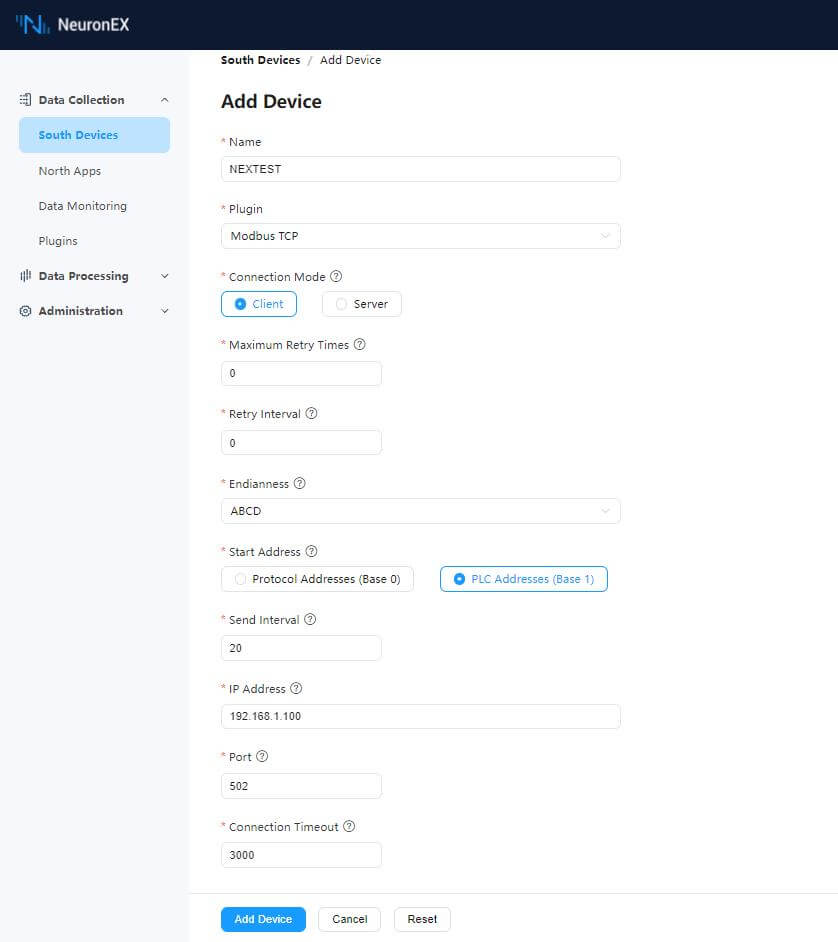
After Modbus settings is completed, the Connection Status of this device will still disconnected, here we need to add Data Point to establish data communication between gateway and slave devices.

- Create Data Point
Click the device you want to collect data and then fill in the group name, click “Create”.
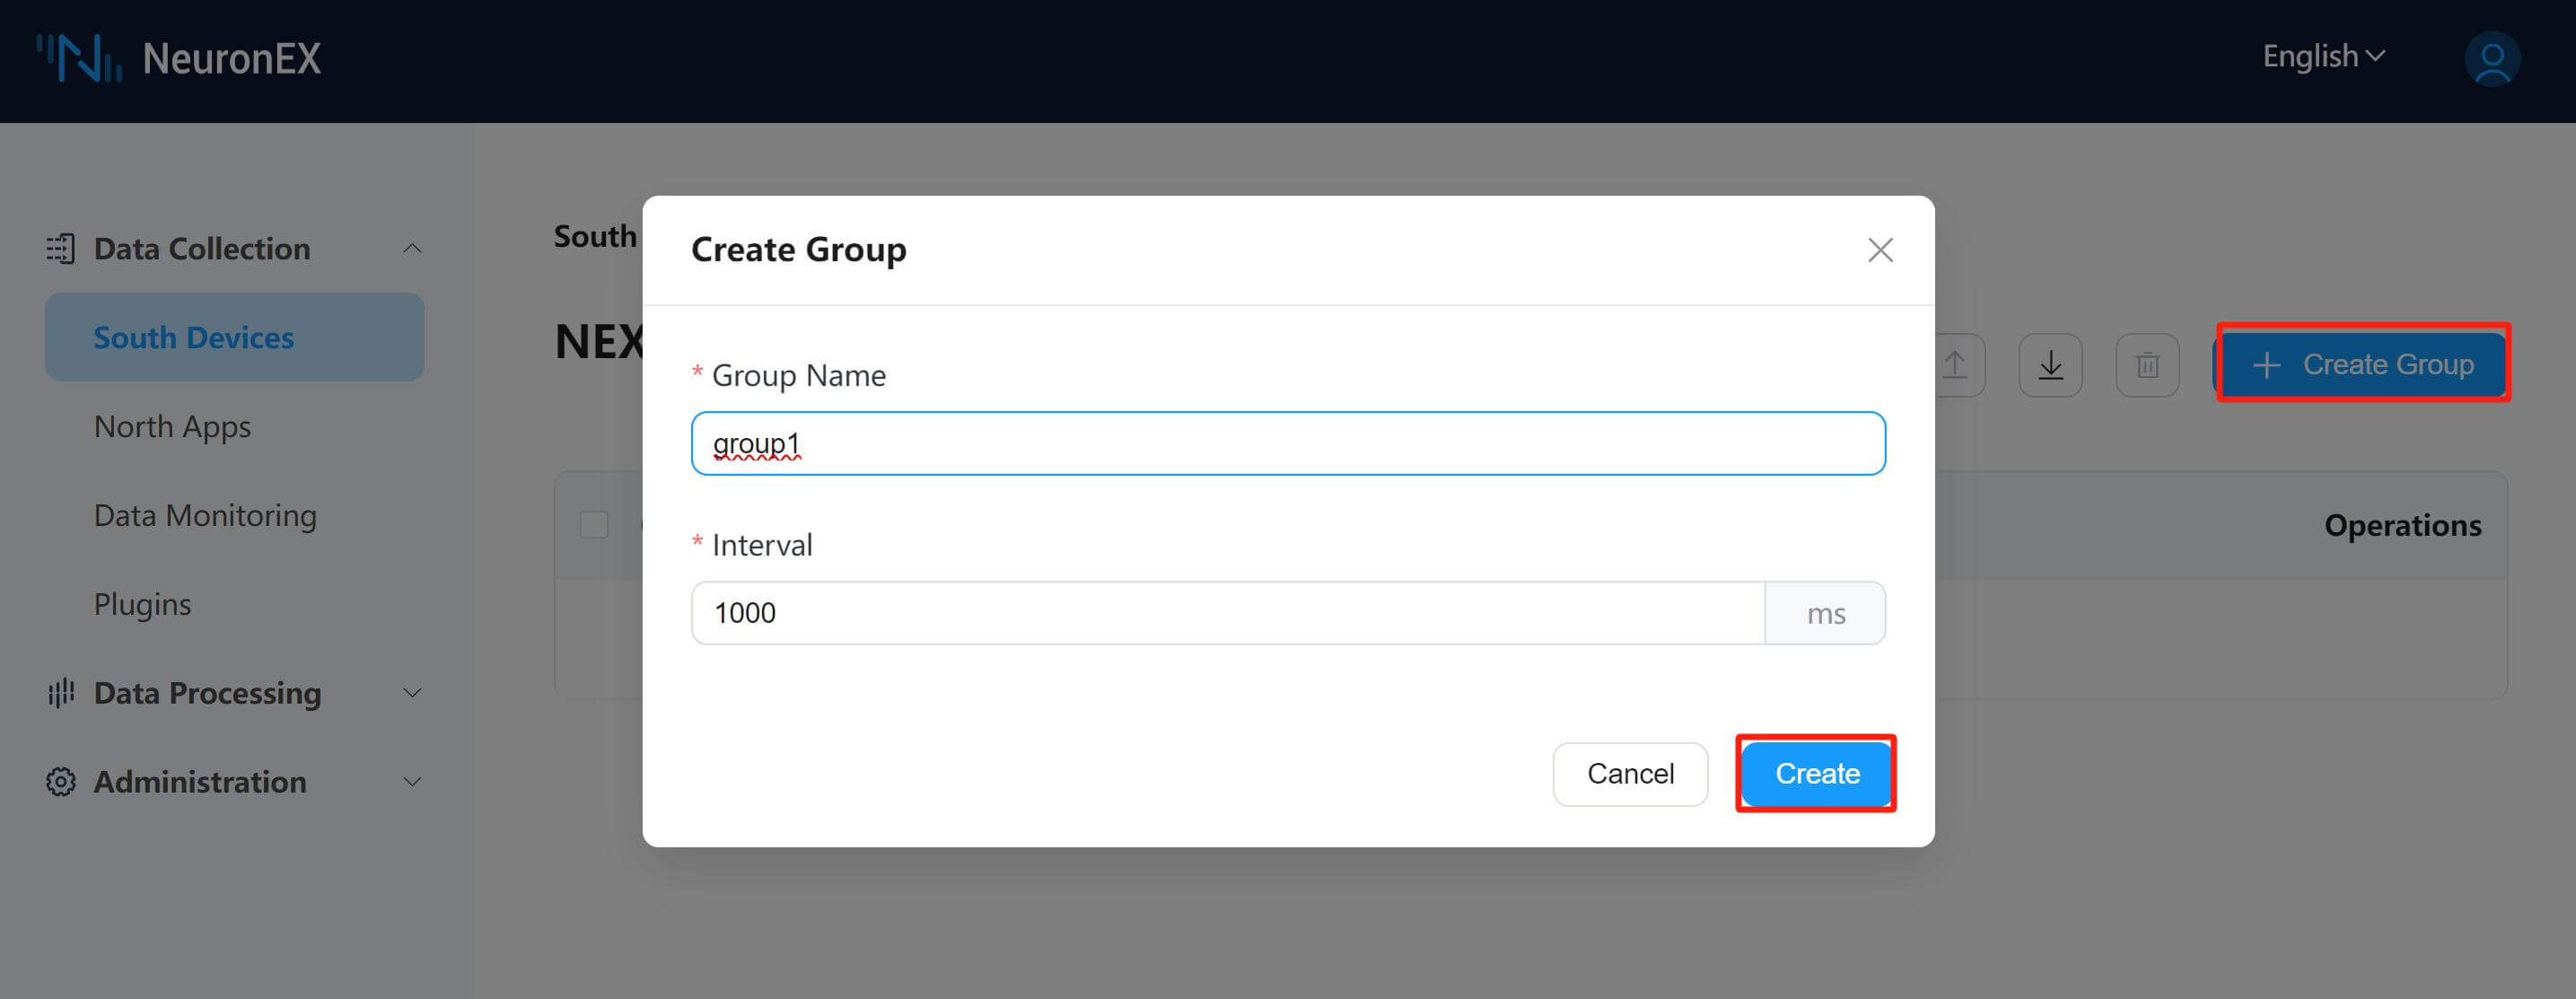
After created the new group, click any blank space of it to enter Node Tag list. And then click “Add Tags” to create collecting rules.

Add Tags
- Name: fill in the name of the equipment point, for example, pressure;
- Attributes: drop down to select point attributes, for example, Read;
- Type: drop down to select the data type, for example, UINT16;
- Address: fill in the driving point address, for example, 1!40001;
- Click the “Create” button to complete the creation of Tag;
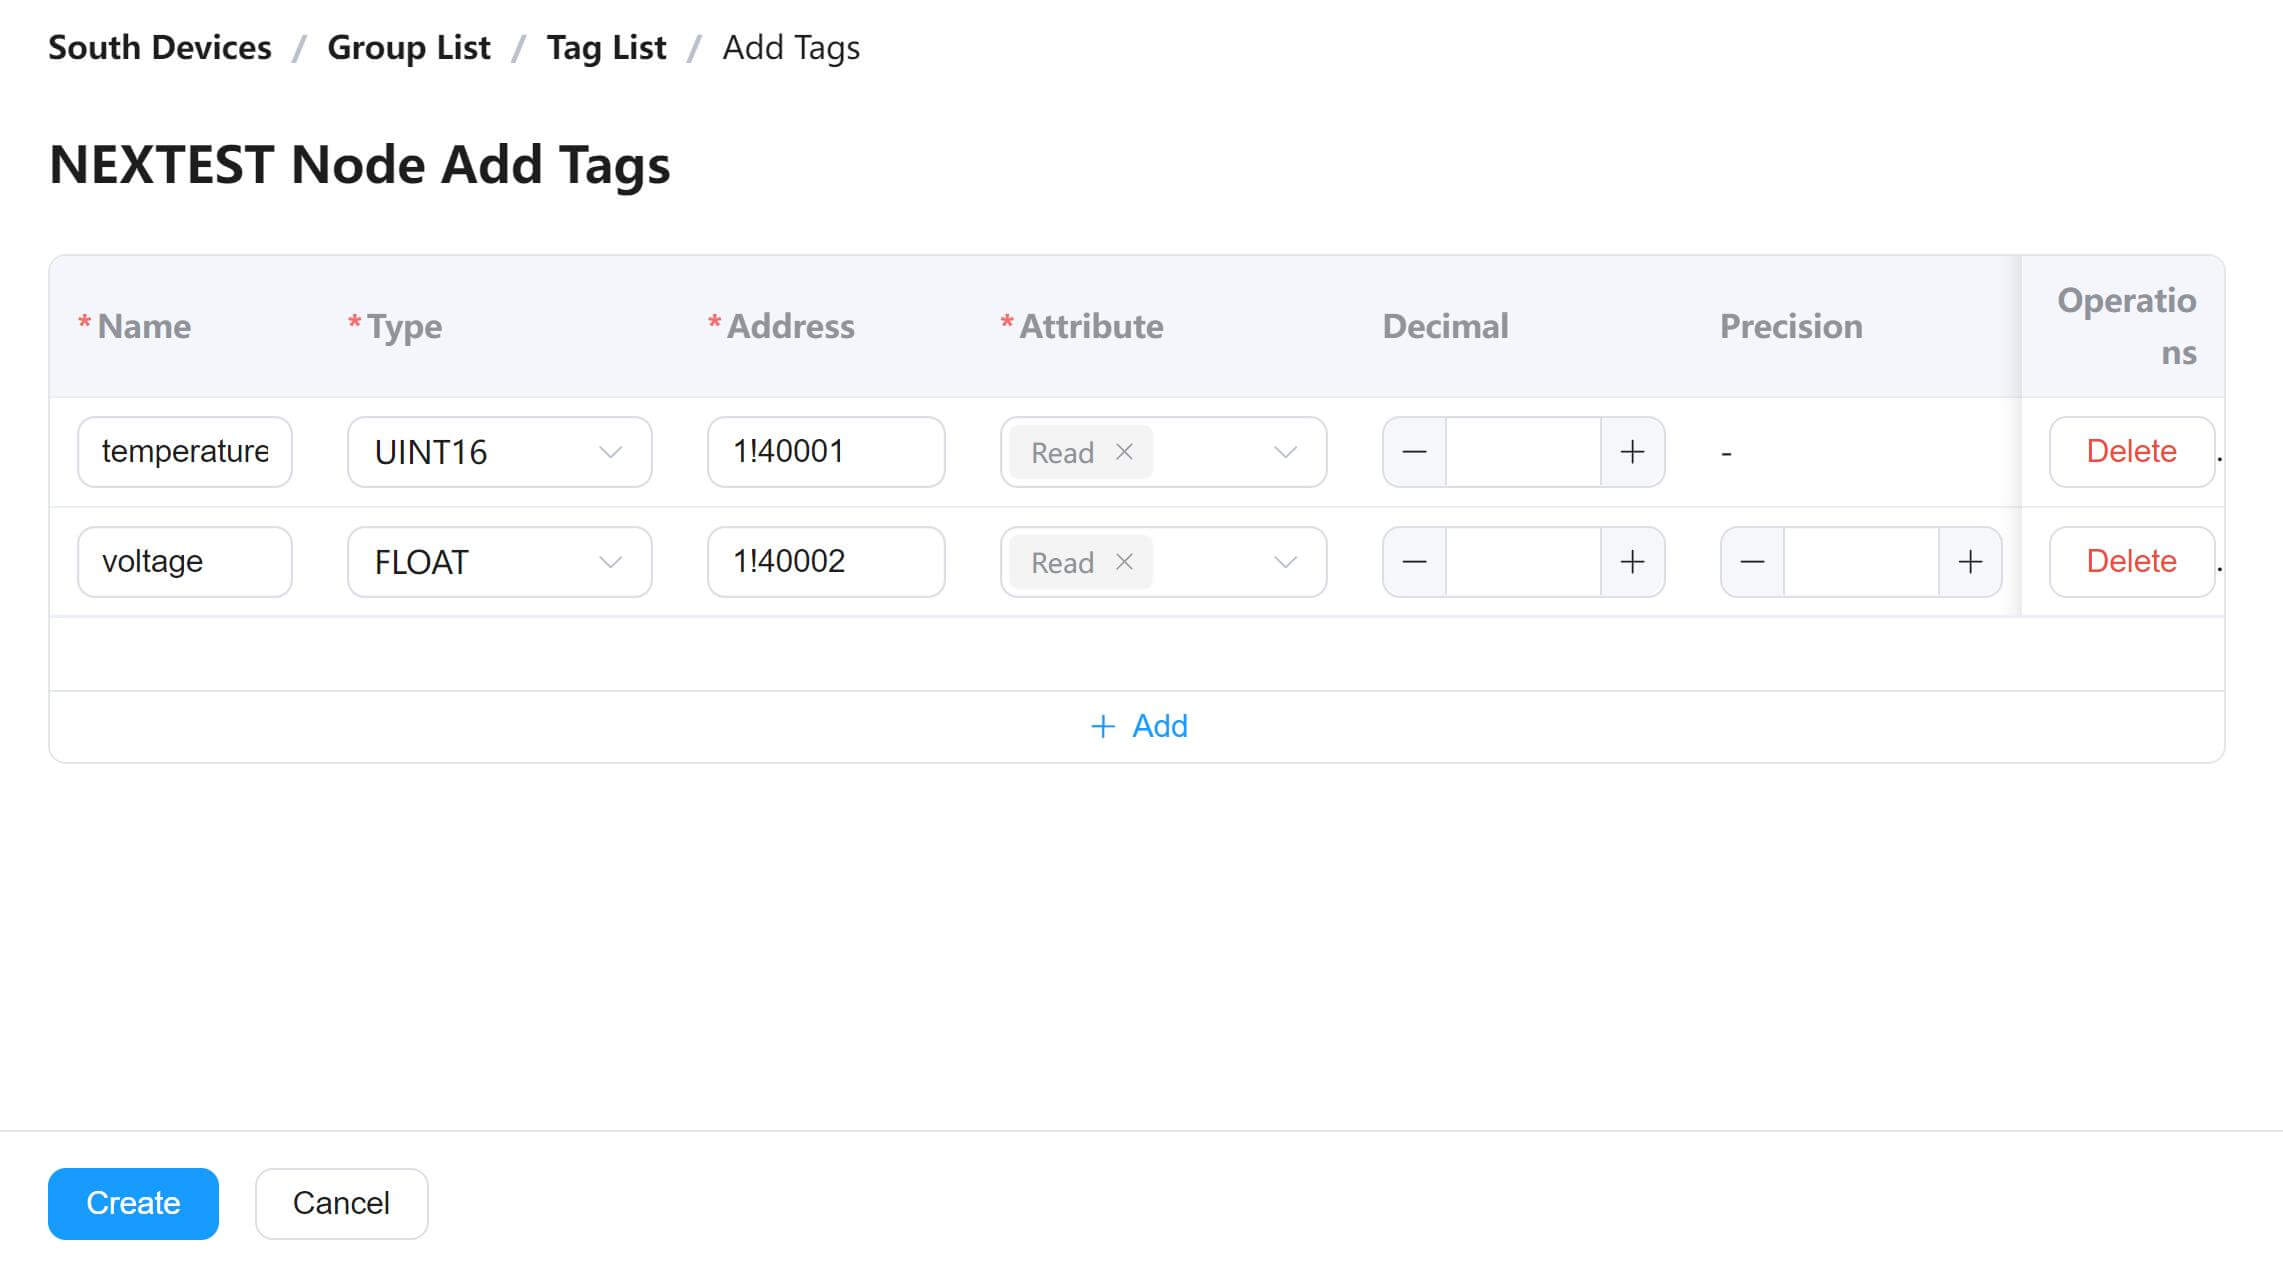
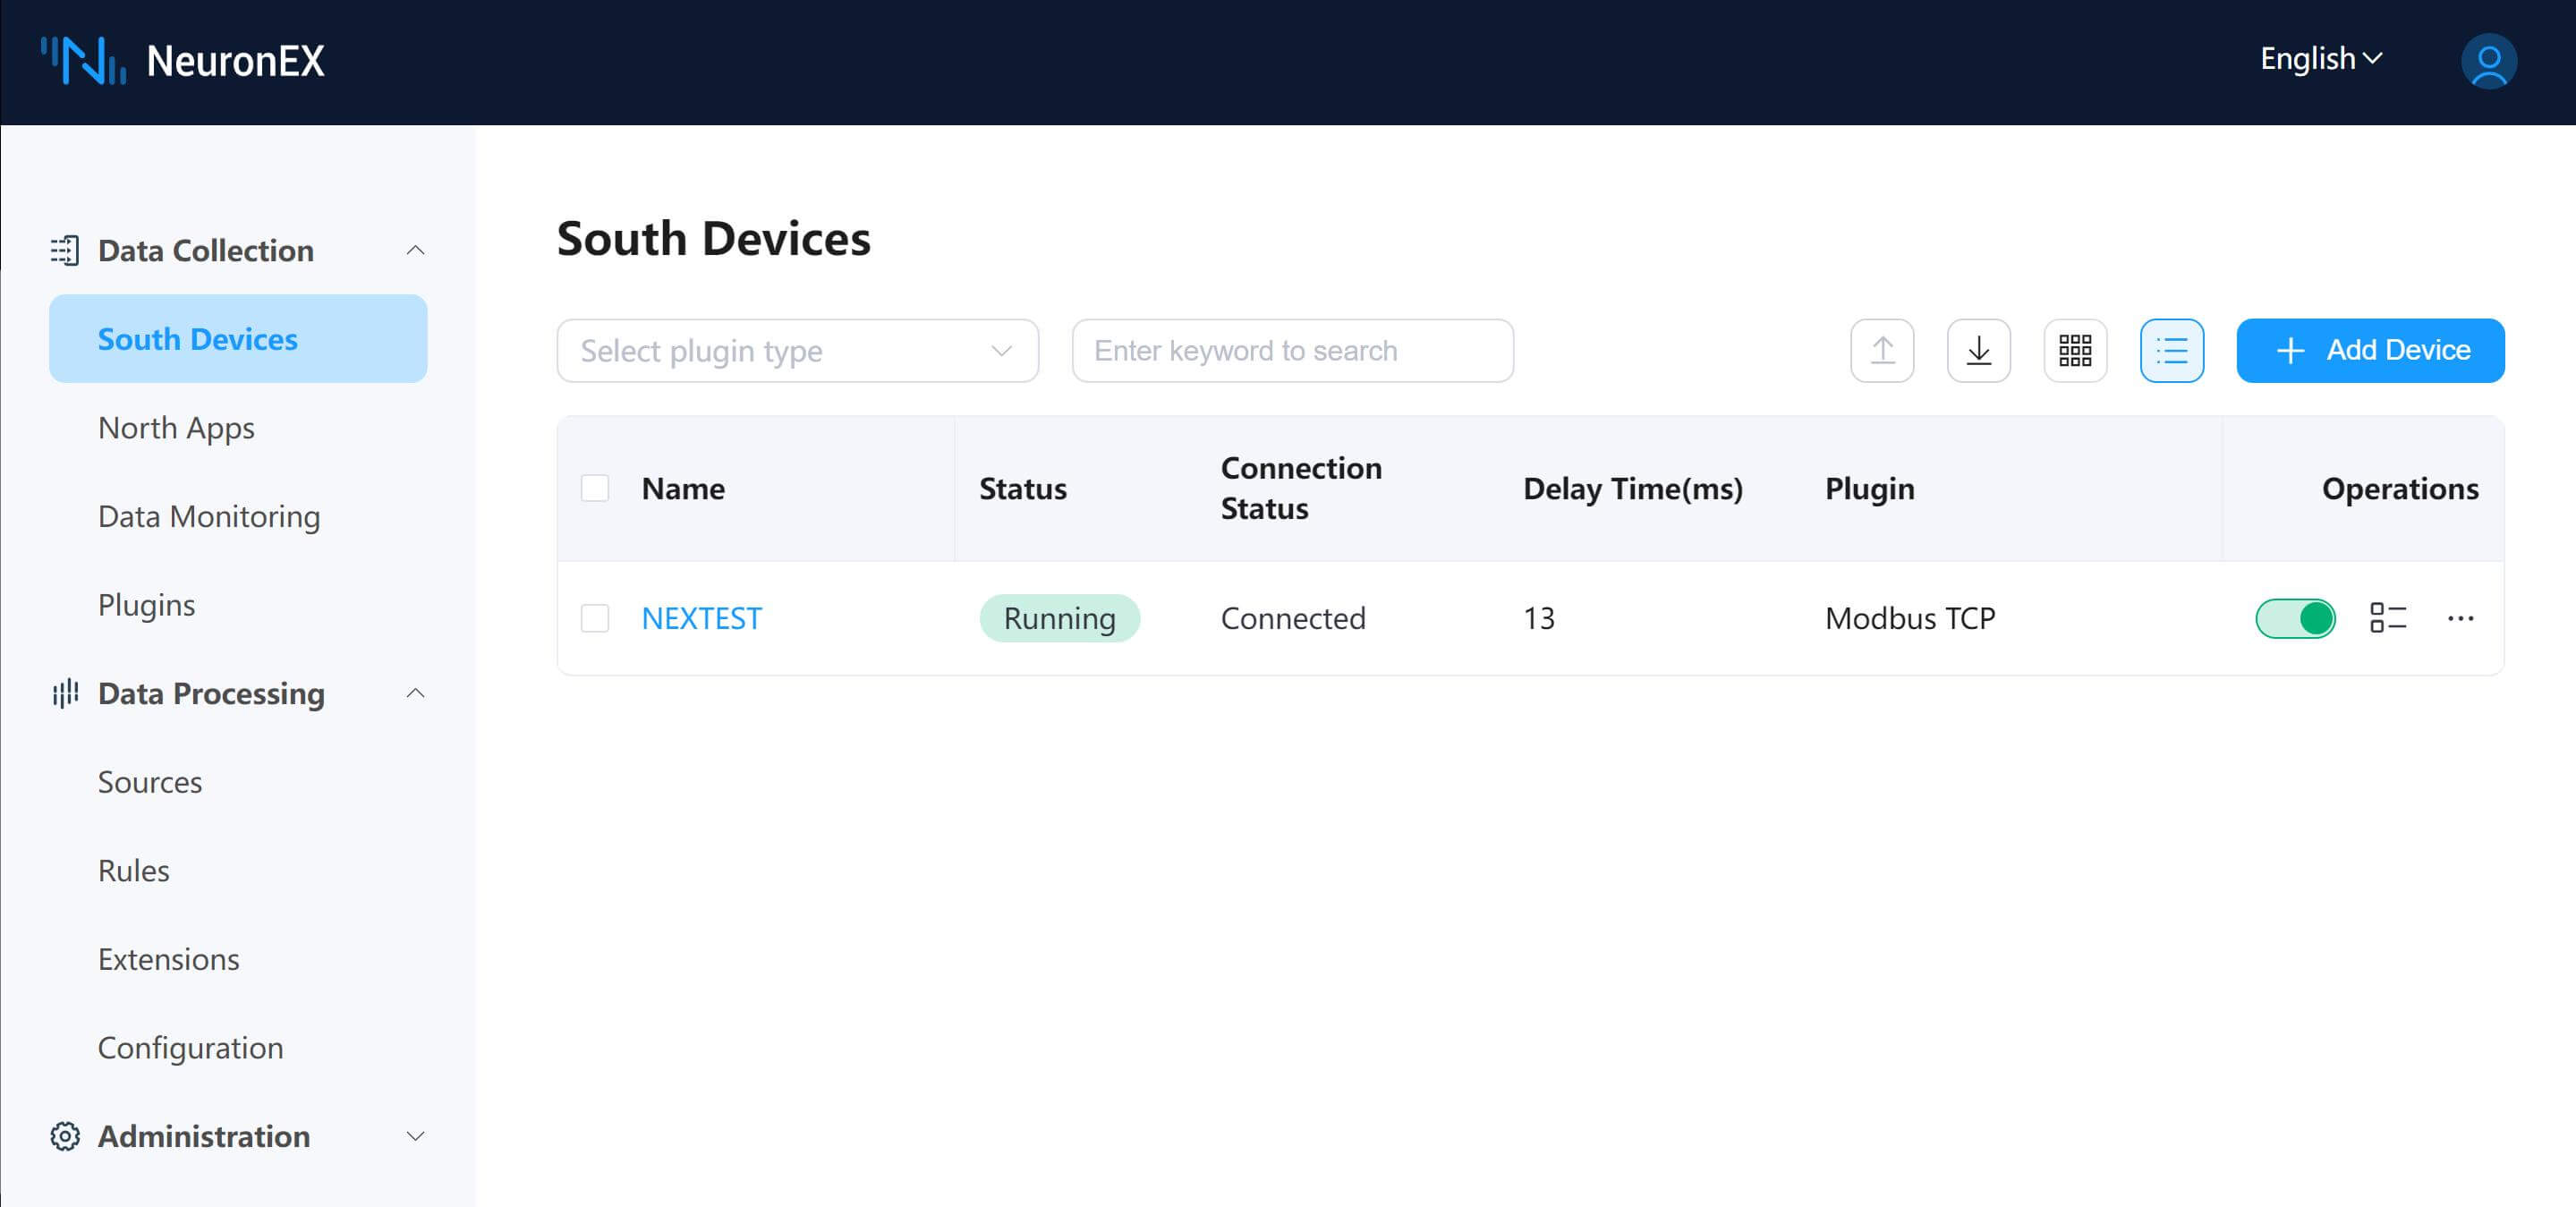
After created tags, the gateway will automatically collect data from slave devices according to the tags’ rules. Back to South Devices page, the Connection Status will show “Connected” if communication between gateway and slave device built successfully.
- Data Monitoring
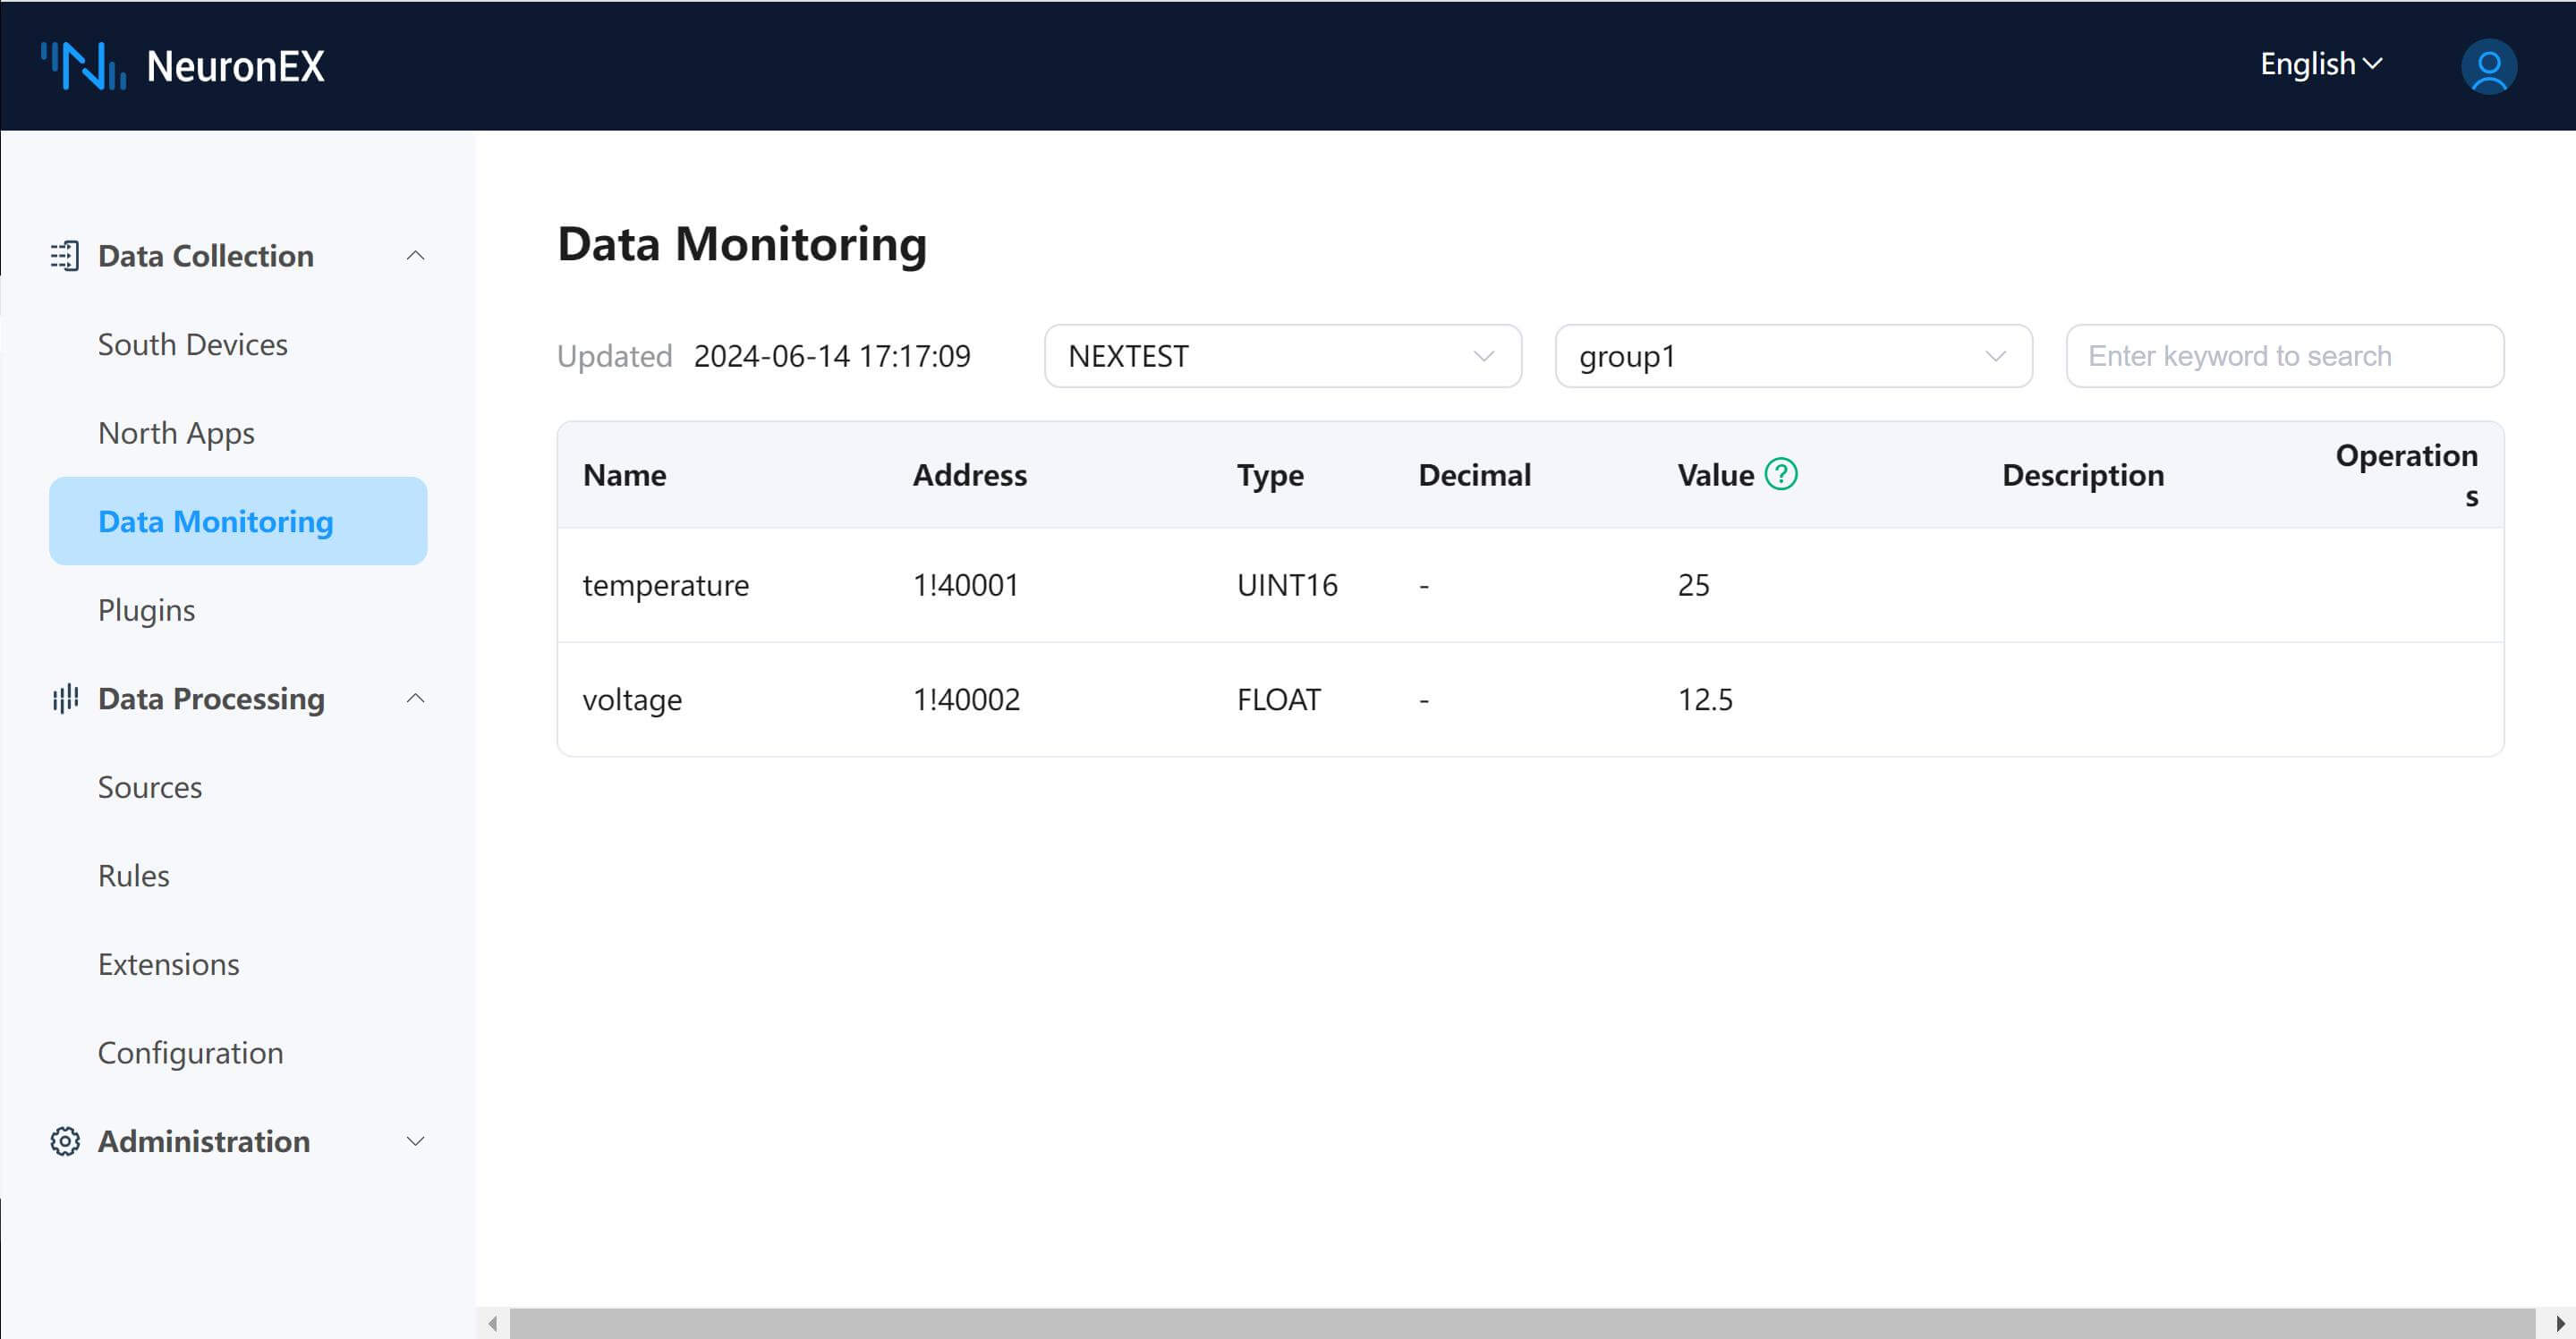
Enter “Data Monitoring” page in “Data Collection” menu, select the “South Device” and “group”, then we can check the real-time data from slave devices here.
- North Application Configuration
- Create North APP node
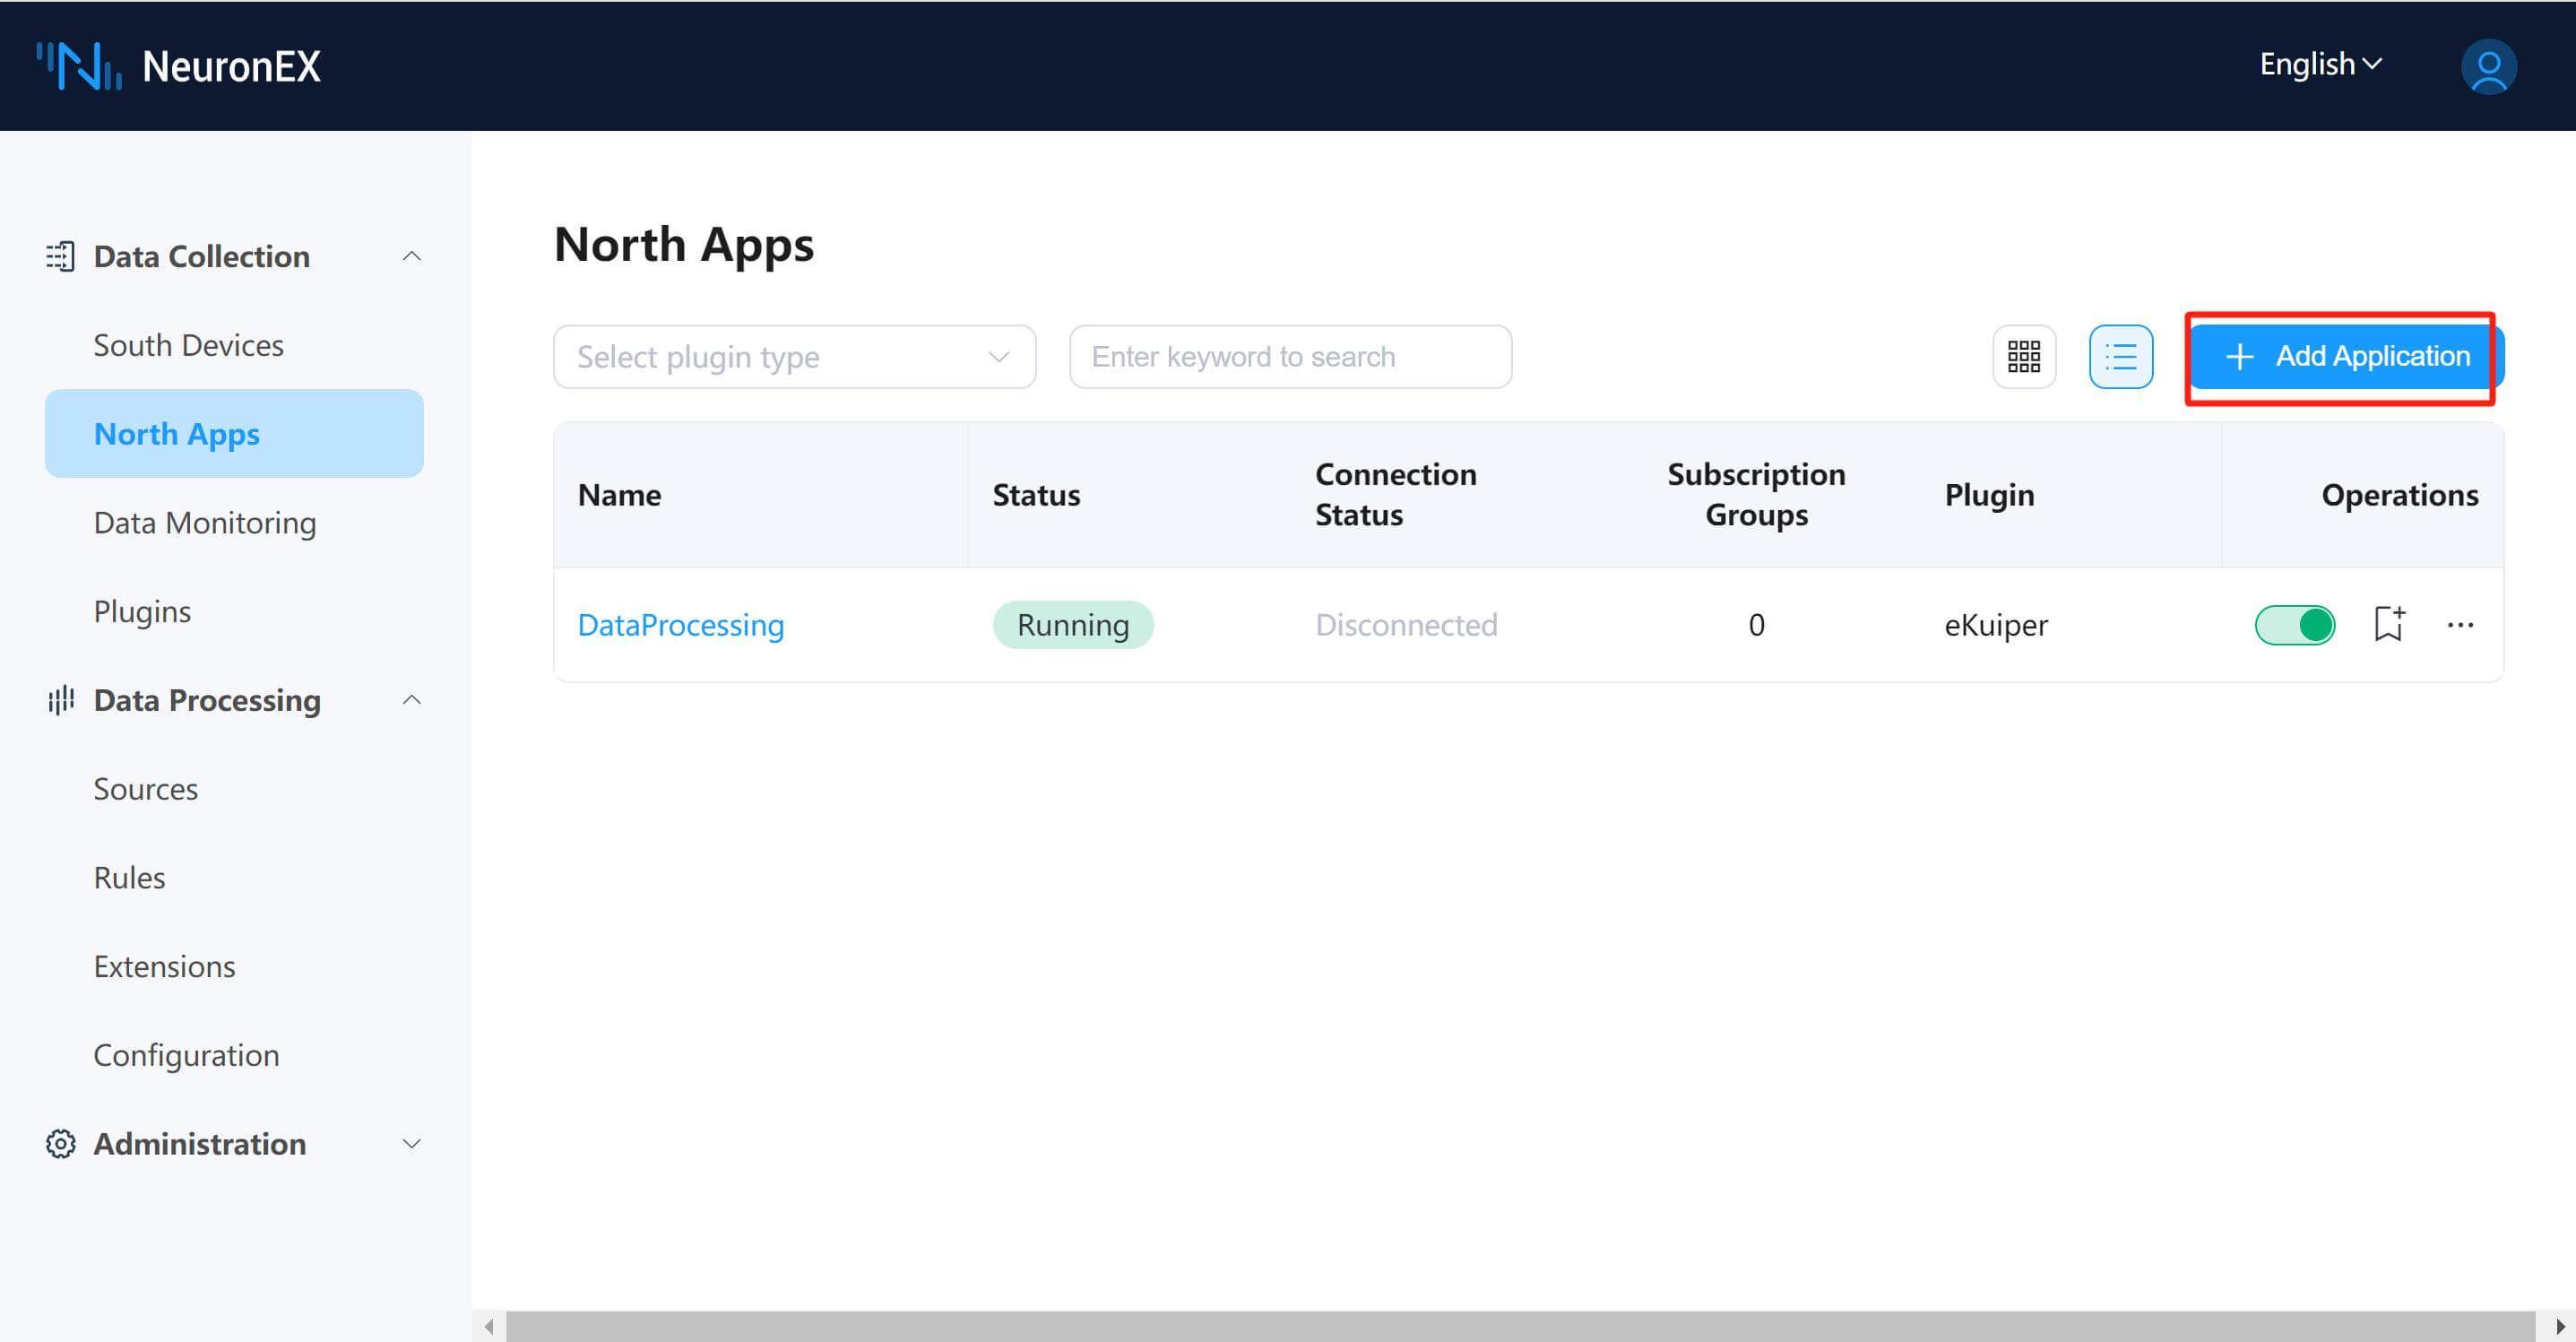
Northbound application nodes are used for data interaction between gateway and various northbound applications. Taking the MQTT plug-in as an example, a new MQTT node is added.
- MQTT Broker Settings
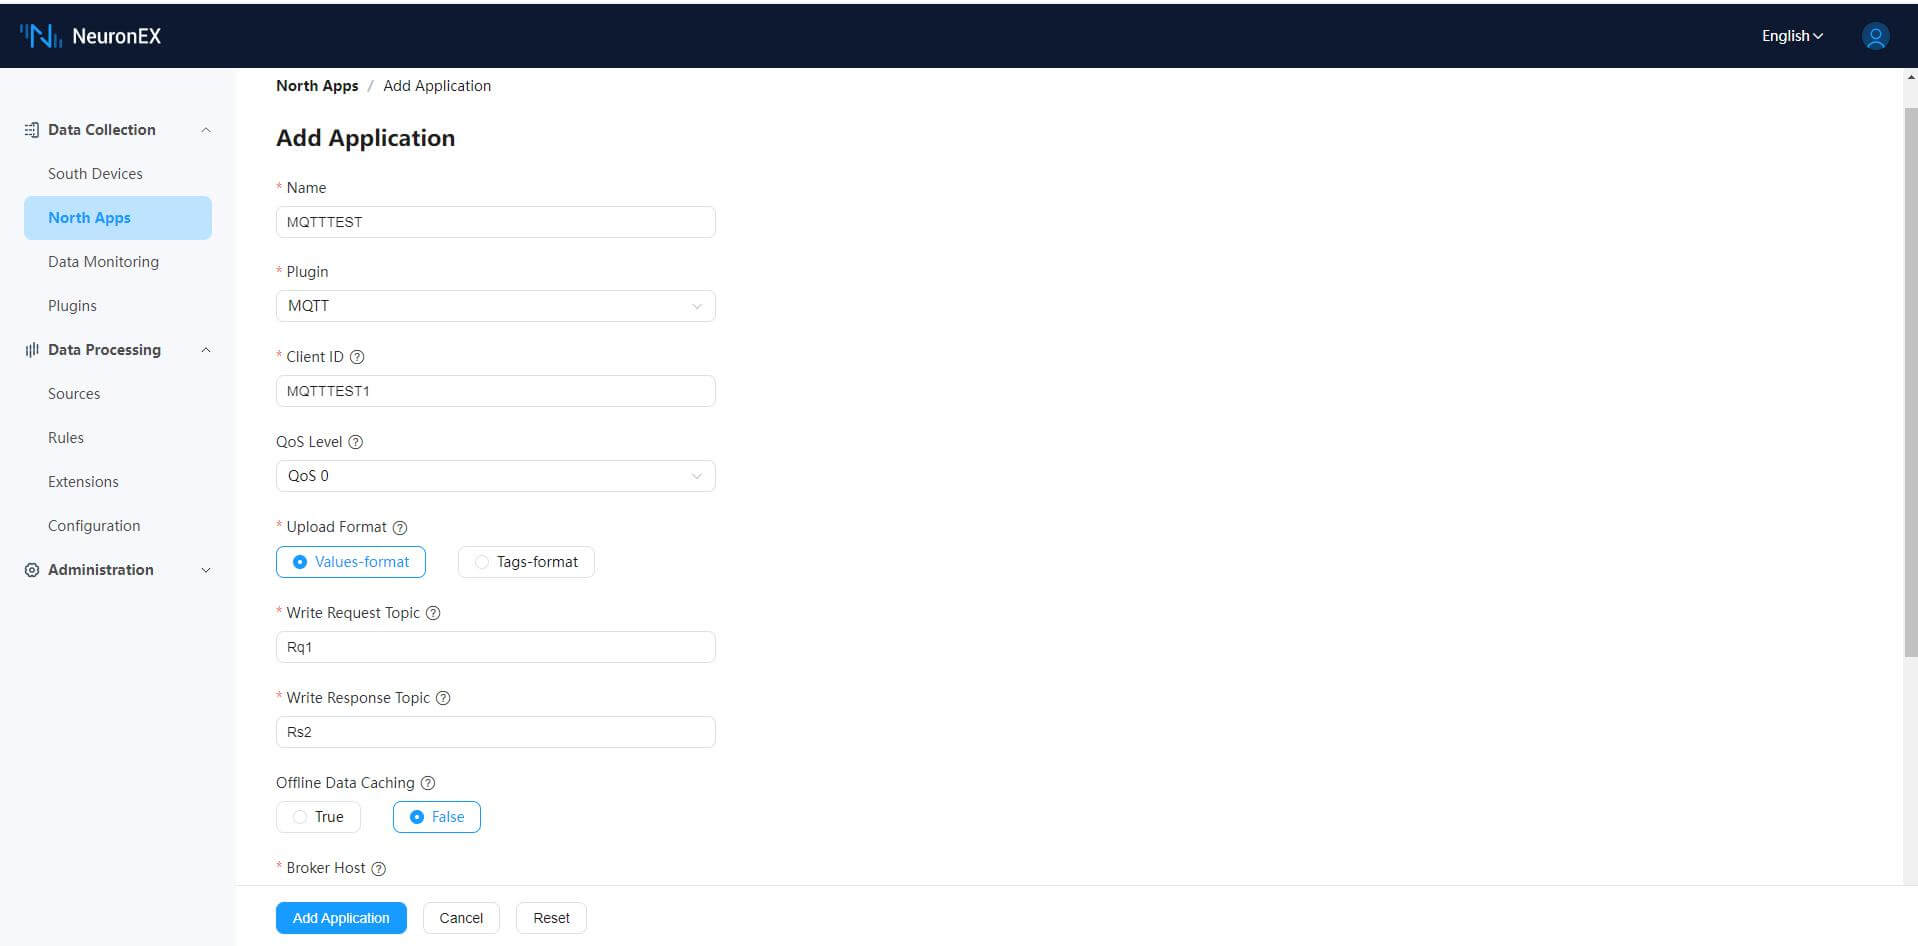
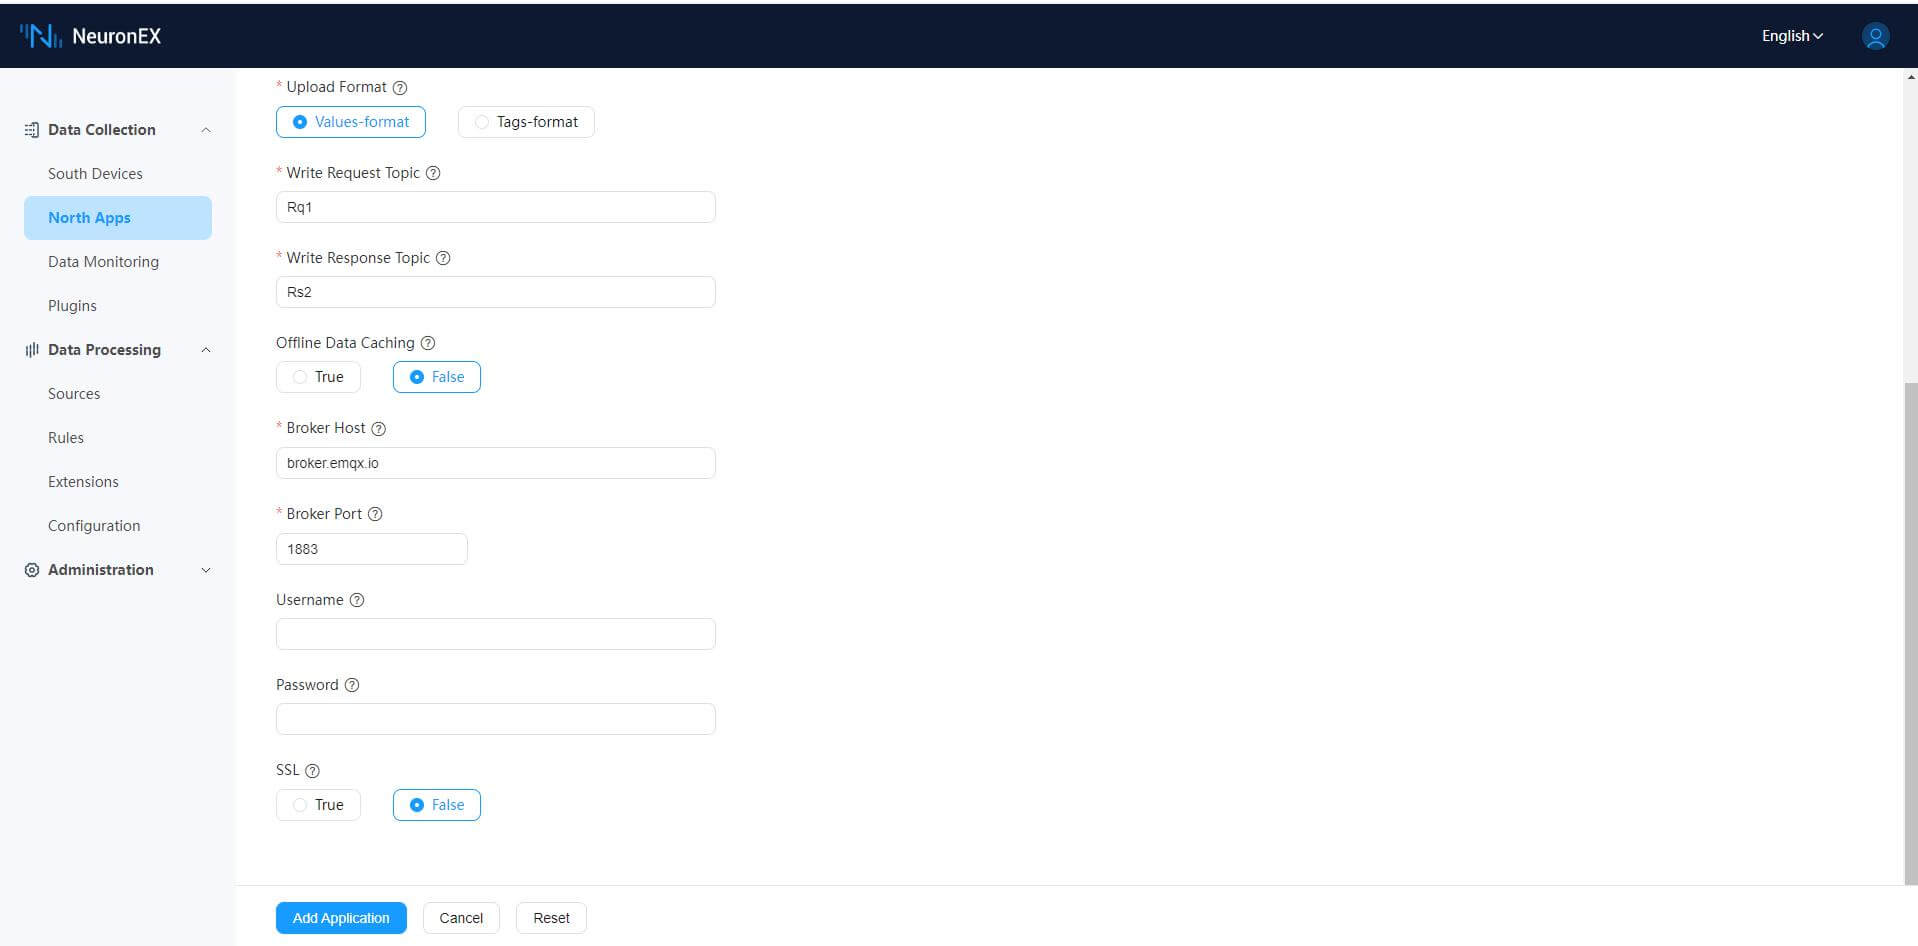
Here we need to establish the parameters of MQTT Broker.
- Write Request Topic: MQTT Topic to receive write request messages.
- Write Response Topic: MQTT Topic to send write response messages
- Broker Host: Fill in the mqtt broker address. By default, the public EMQX Broker broker.emqx.io is used;
- Broker Port: fill in the mqtt broker port, the default is 1883;
Click Submit to complete the northbound application configuration, and the application card automatically enters the Running status.
- Subscribe to Southbound group
The collected data send to the North Apps in groups, and users need to select which groups of data to send. Click Add Subscription button to add a new subscription, as shown in the figure below.
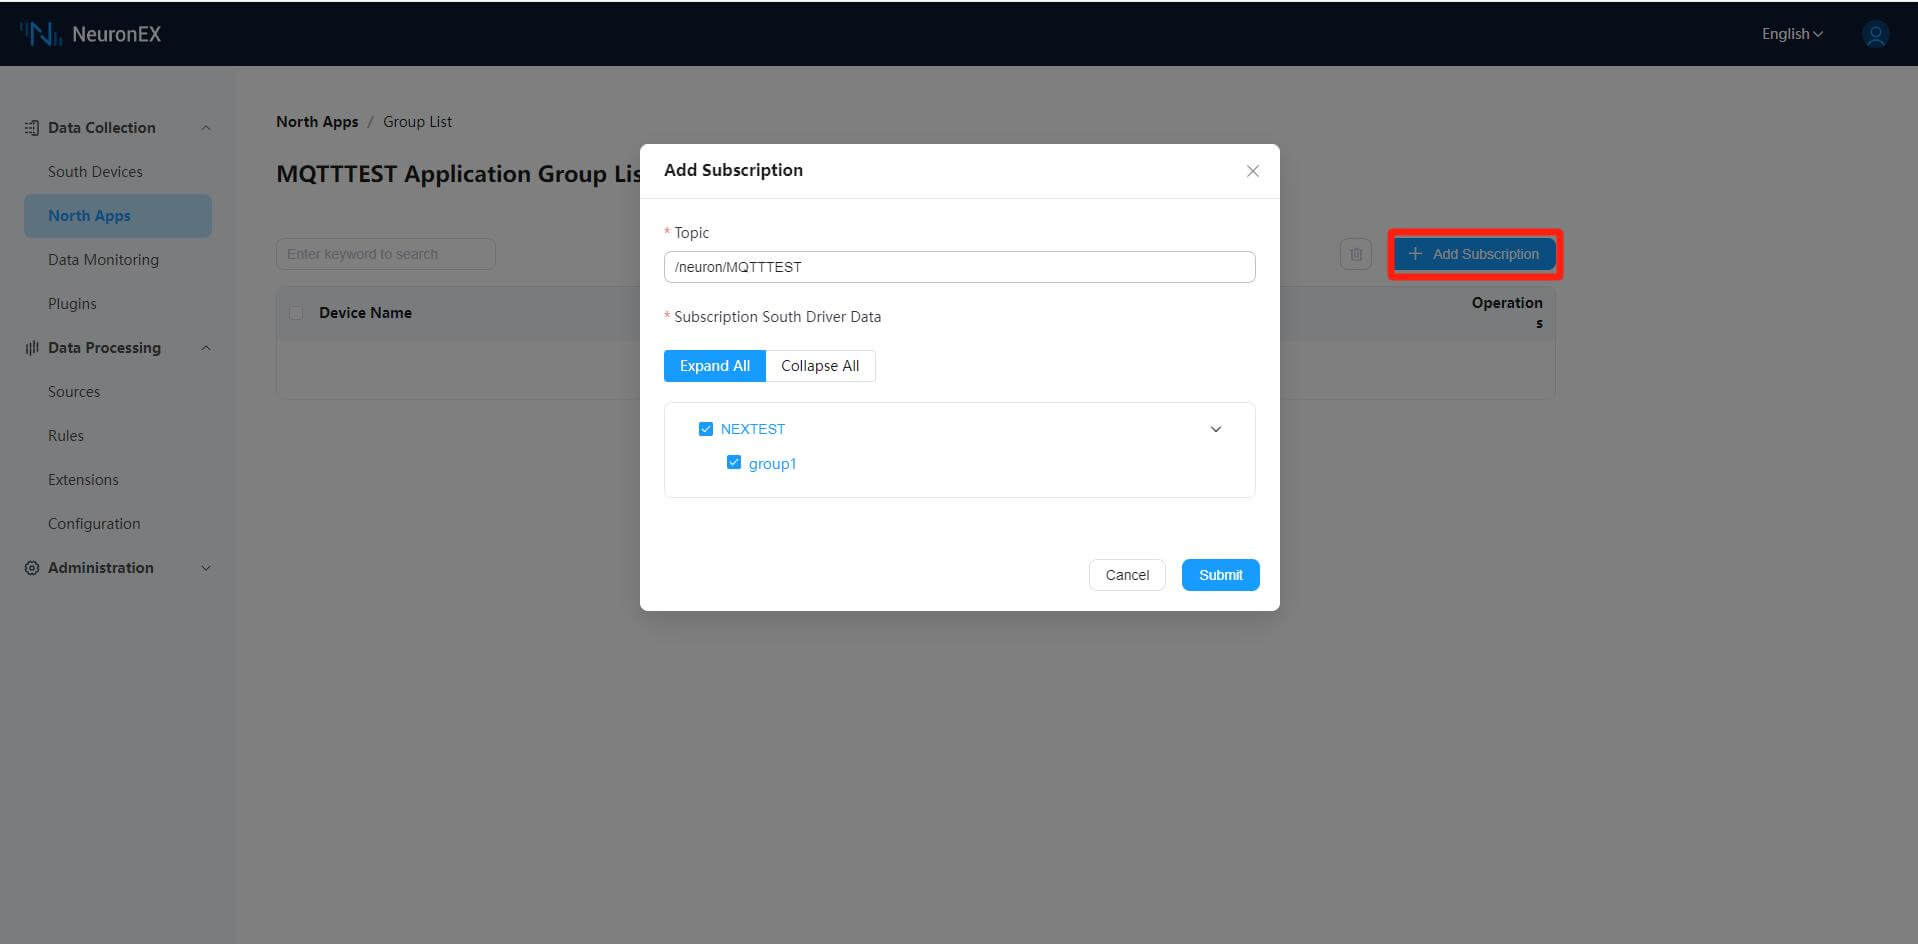
- Topic: The topic can be customized, and the example uses the default topic;
- Subscription southbound device data: independently select the group to be subscribed;
Click Submit to complete the subscription.
3. View Data at MQTT Client
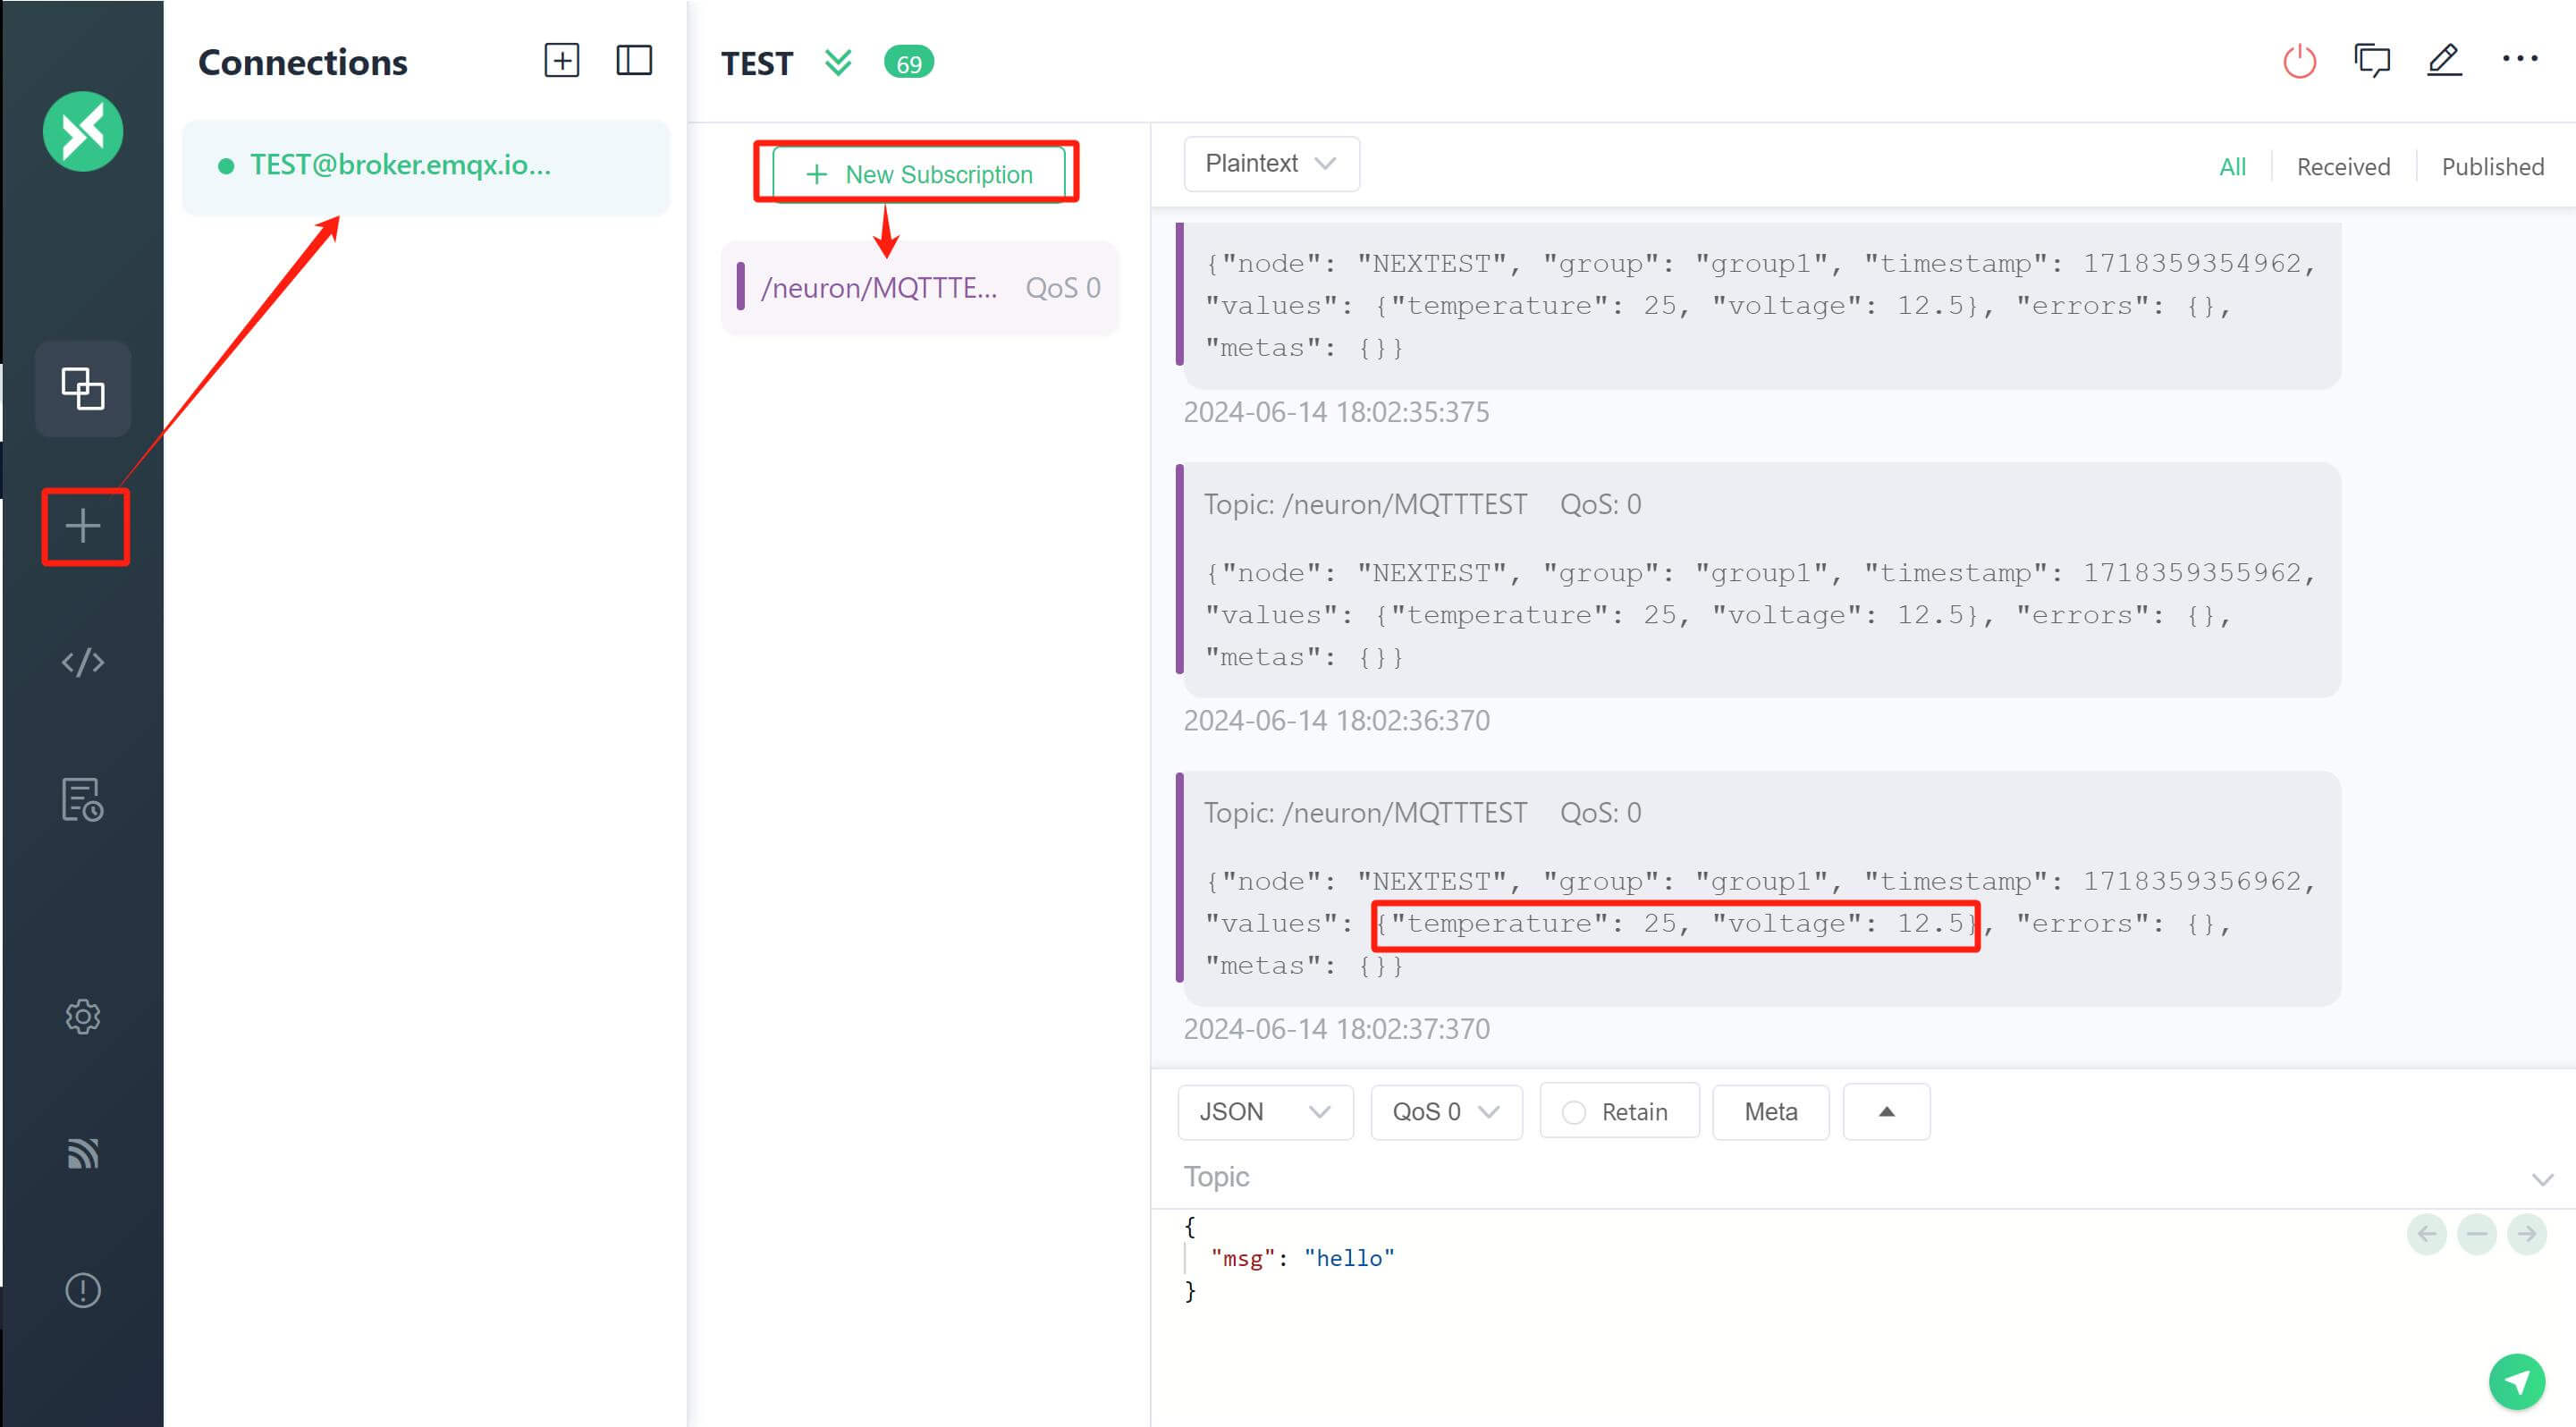
We can use MQTT Client software like MQTTX to view the data collected and reported by gateway, and we need to subscribe the Topic form NeuronEX, after added the New Subscription, we can receive the JSON message uploaded by gateway, the details are as bellow:
PS: This document shows how to set up Modbus TCP by NeuronEX on Bivocom Gateway TG465, there are also many other plugins of different protocols, such as Modbus RTU, OPC UA, IEC 60870-5-104, IEC 61850, BACnet/IP and so on, you can search NeuronEX website to learn how to set up different protocols of plugins.



Comment