How to Deploy Deepseek on Bivocom TG465
DeepSeek is a specialized deep learning model developed by Meta AI. It is designed for information retrieval and data analysis tasks, particularly useful in handling large datasets commonly found in IoT applications.
DeepSeek Capabilities:
Information Retrieval: DeepSeek can efficiently search and extract specific information from vast datasets, enabling quick access to relevant data.
Data Analysis and Summarization: It can analyze complex datasets to identify patterns, trends, and anomalies. Additionally, DeepSeek is adept at summarizing extensive information into concise and meaningful summaries.
Content Generation: The model is capable of generating new content based on the patterns and structures it has learned from the data it has been trained on.
Relationship between Ollama and DeepSeek:
Ollama: Ollama and DeepSeek are both variants of the same underlying language model (like Chatgpt), developed by Meta AI for different purposes.
DeepSeek: Specializes in data analysis and information retrieval within IoT contexts.
This document will tell you how to run DeepSeek and test on TG465. In order to deploy DeepSeek R1 locally, we need to install Ollama first.
1. Environment and Related Tools Deployment
-
Install Ollama
curl -L https://ollama.com/download/ollama-linux-arm64.tgz -o ollama-linux-arm64.tgz
sudo tar -C /usr -xzf ollama-linux-arm64.tgz

-
Create a New User and Group for Ollama
sudo useradd -r -s /bin/false -U -m -d /usr/share/ollama ollama
sudo usermod -a -G ollama $(whoami)
-
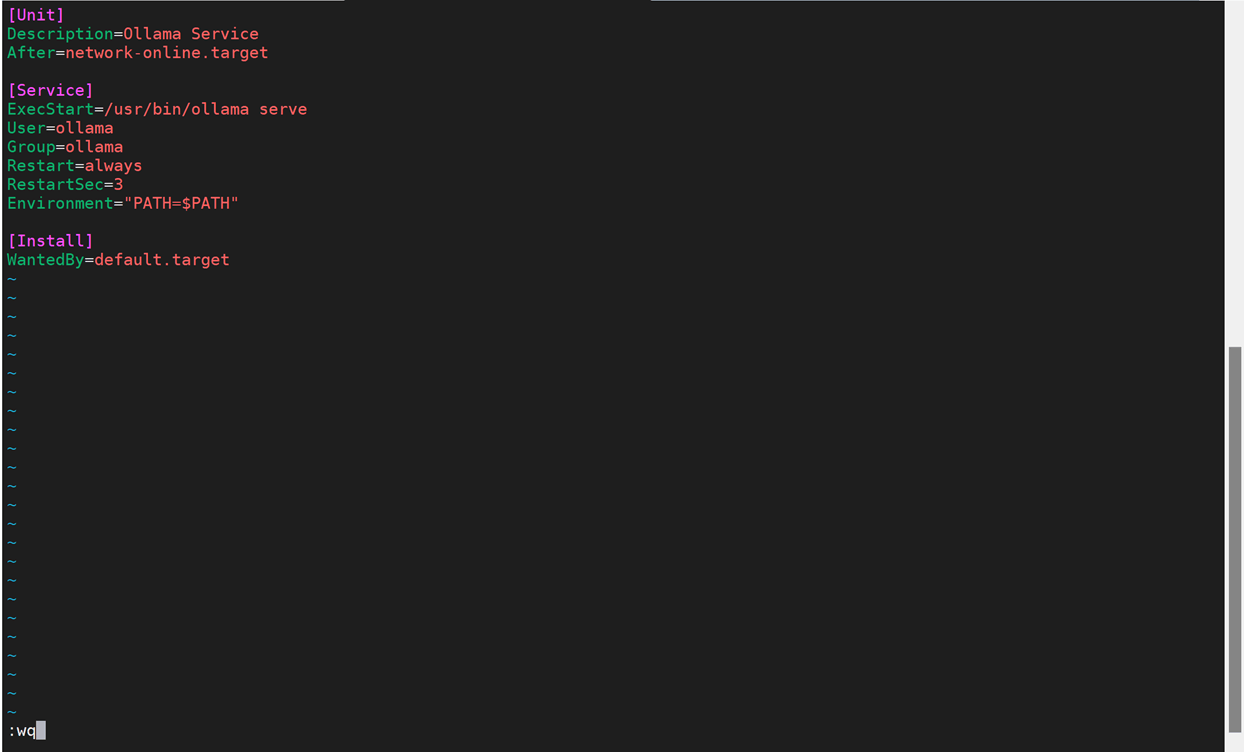
Add the service configuration to enable Ollama to be managed by Systemd, /etc/systemd/system/ollama.service:
(1) Enter path /etc/systemd/system/, create ollama.service file.
cd /etc/systemd/system/
touch ollama.service

(2) vi ollama.service
[Unit]
Description=Ollama Service
After=network-online.target
[Service]
ExecStart=/usr/bin/ollama serve
User=ollama
Group=ollama
Restart=always
RestartSec=3
Environment=”PATH=$PATH”
[Install]
WantedBy=default.target

-
Start Ollama Service
sudo systemctl daemon-reload
sudo systemctl enable ollama

2. Model Download and Launch
-
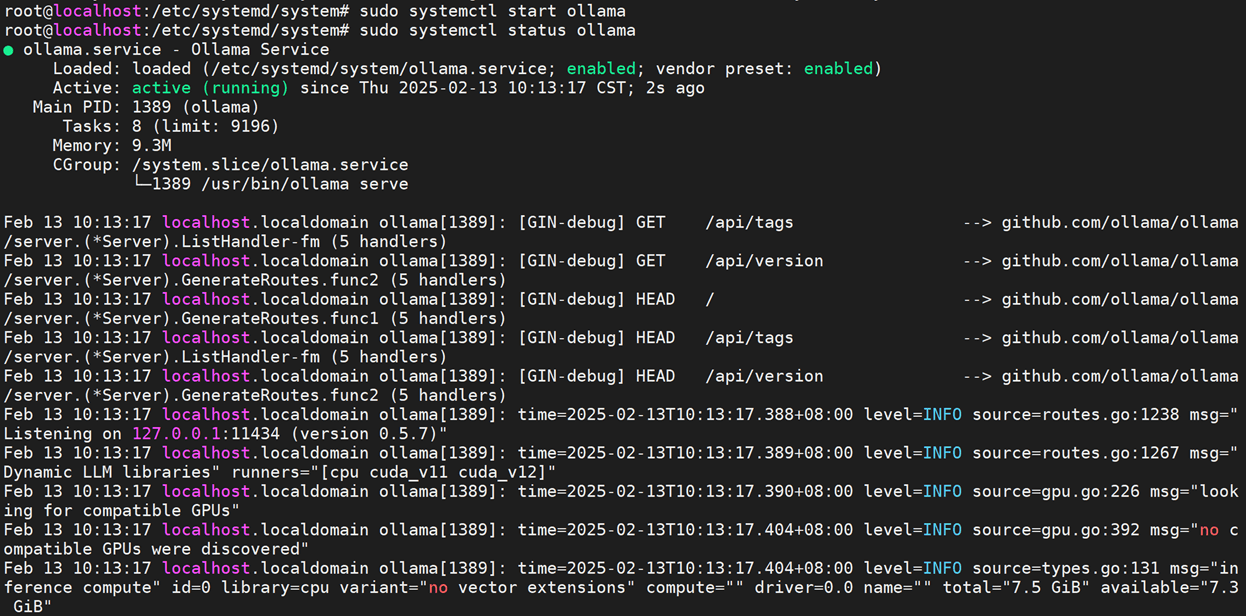
Start Ollama and Check Running Status
sudo systemctl start ollama
sudo systemctl status ollama

-
Download and Run deepseek-r1-1.5b Model
ollama run deepseek-r1:1.5b

-
Test


Comment