This quick guide tells you how to enable OPC UA on Bivocom IOT routers, including router and OPC UA software settings.
Router Settings
- Enable data collect at basic setting.

2. Chose the right COM port and protocol, then click save and apply.

3. Setup the modbus rules and use Modbus slave to simulate slave device.


4. OPCUA Sever
1) Setup the server port and name, here we use 4840 port and the name as IoT in Motion OPCUA Server.
2) Anonymous Enable chose disable, here we set the username and password both as admin
3) Save&Apply.

OPCUA Software Settings
1. Unzip uaexpert-bin-win32-x86-vs2008sp1-v1.5.1-331.zip, install uaexpert to simulate client device.
2. Open Uaexpert.

3. Right click on the Server to add new server.
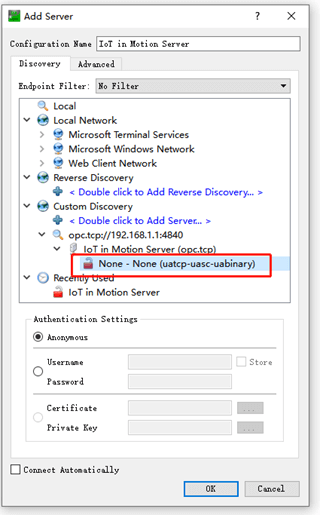
4. Double click Custom Discovery to add server.
5. Enter the ip address and port of server, here we use 192.168.1.1:4840.

6. Double click on the None-None(uatcp-uasc-uabinary).
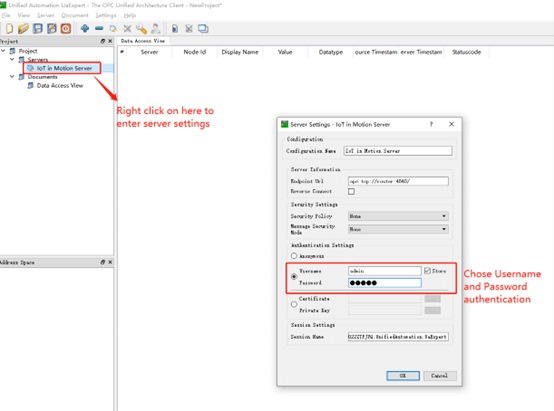
7. We can see new server at the Project plate, right click on it to enter server settings. For Authentication, chose username and password, here we use admin, then click ok button.
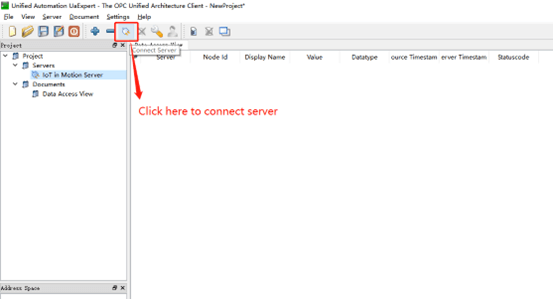
8. Click the connect icon to connect server.
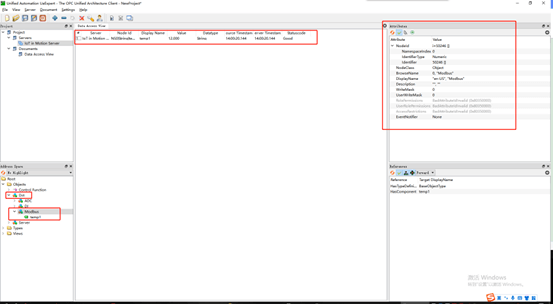
9. You can see Dct at the Address Space, open the Modus, then drag it to Data Access View. You will see the details here.


Comment